
Visual Studio IDE Tip: Navigate Backward and Forward Through Source Code
The Navigate Backward and Navigate Forward buttons are such a useful feature of Visual Studio that I’m often surprised to find developers that don’t already know about it. However, there is so much to know in the world of software engineering that it’s impossible to know everything. It’s in that spirit that I’m writing these Visual Studio IDE tips to help developers better understand the features in Visual Studio that they may not know about, and that can save a significant amount of time when they are needed.
The purpose of the buttons is very much implied in the name. However, the usefulness of the buttons is often overlooked or misunderstood. As a user works in Visual Studio, opening new files, jumping to different locations in files, possibly using features like Go to Implementation , etc., Visual Studio keeps track of the locations in the files where the developer has navigated. Think of it like a web browser’s Back and Forward buttons.
As you are examining source code, whether it’s for debugging, understanding a codebase, or evaluating where to put a new feature, it can be very easy to lose track of where you have been. I.e., which files contained certain classes, which classes contained certain functions, etc. Rather than start over or relying on memory, you can retrace your steps using Navigate Backward and Navigate Forward.
Navigate Backward and Navigate Forward are typically found in the upper left corner of the Visual Studio interface, just below the main menu bar. In my screenshot, the buttons are directly below the File text in the menu bar. You can also see that Navigate Backward, which I’m hovering over in the screenshot, is enabled, while the Navigate Forward button is not. This is because I haven’t navigated backwards yet, so there is nowhere for Navigate Forward to take me.
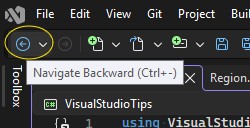
Location of Navigation Buttons, Just Below The Main Menu Bar
I keep a small sample application around just to capture screenshots. It contains a Program.cs file, several classes, and two interfaces that roughly resemble a real-world .NET application. I’ll use it for a quick demonstration.
You can follow along in the gif below to get an idea. Here’s what happening:
- I double-click the
Program.csfile to open it. - I put the cursor over the
ICustomerServicevariable type declaration and clickF12to go to the interface definition forICustomerService. - I put the cursor over the
GetCustomerByIddeclaration in the interface and pressCtrl + F12to go to the implementation of the function within the CustomerService class. - I double-click the
Region.csfile to open the Region Model. - At this point, I’ve navigated to several locations within the code. From here, I’ll click the Navigate Backward button to go back to the Program.cs, then click the Navigate Forward button to navigate back to the Region Model.
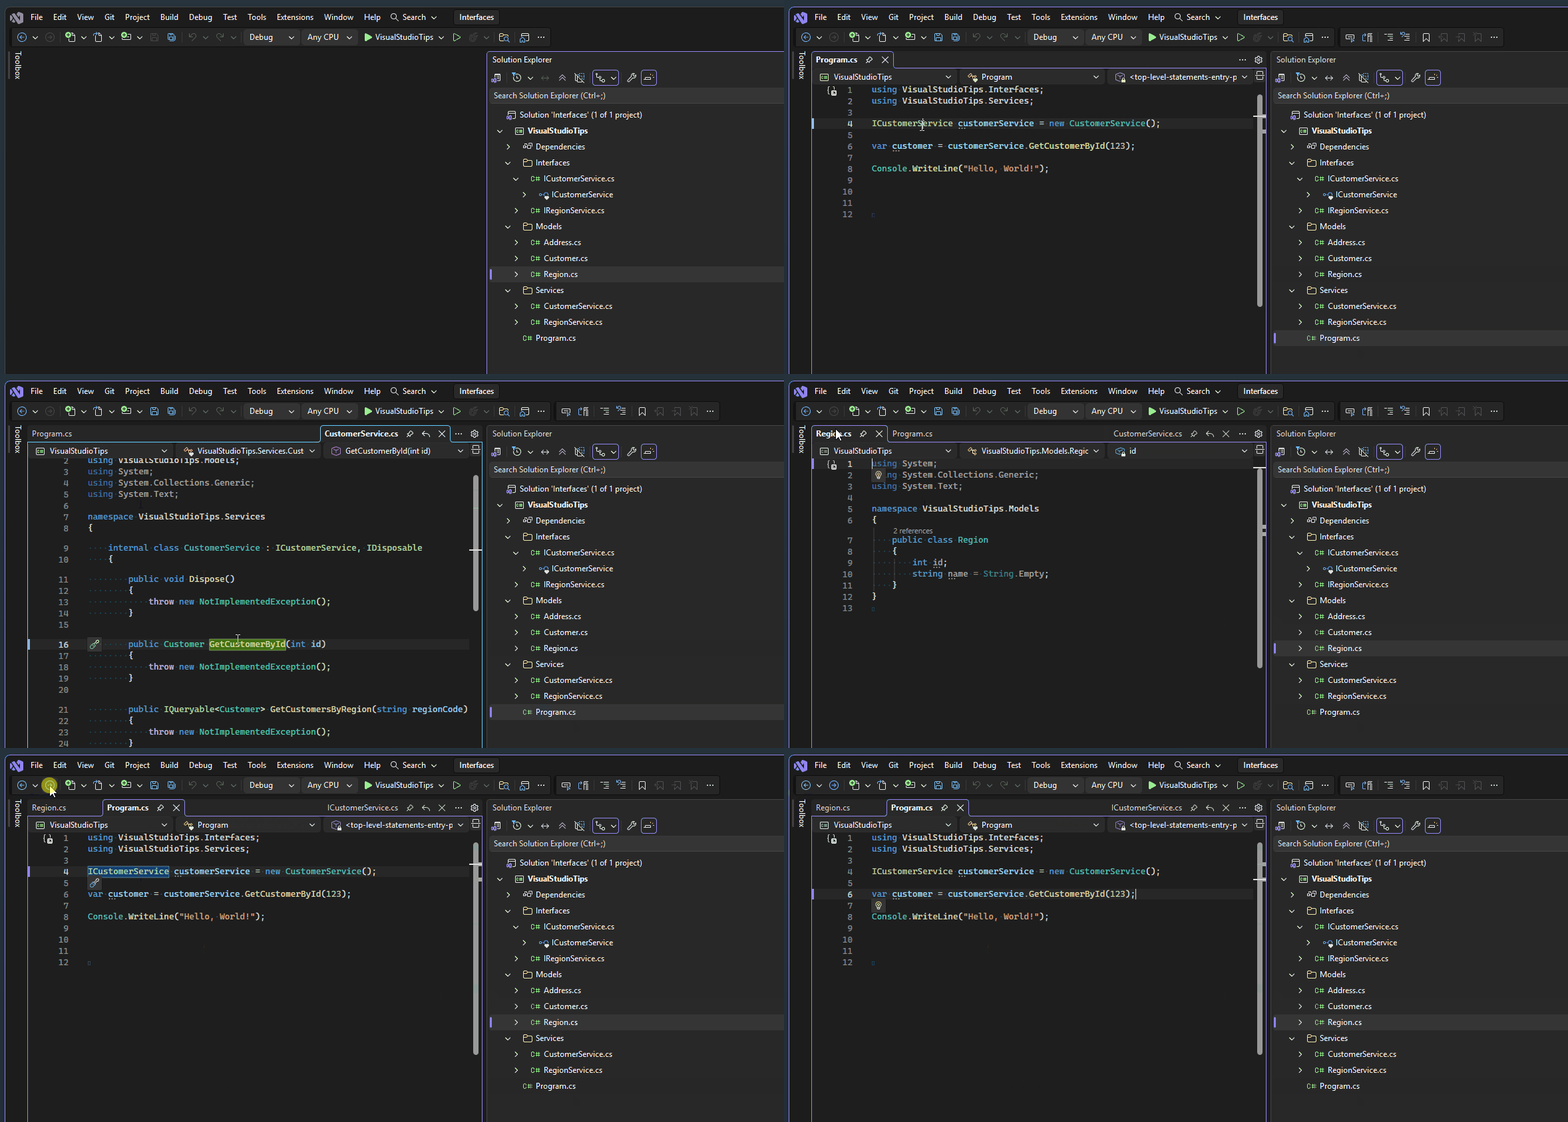
Using the Navigate Backward and Forward Buttons
You may notice something interesting in the GIF. After navigating all the way back to the starting point, Visual Studio displays a drop-down of all the previously visited locations. You can select an item in the drop-down list to navigate directly to that location.
The keyboard shortcuts for these features are Ctrl + - for Navigate Backward and Ctrl + Shift + - for Navigate Forward.
Navigate Backward and Forward is another useful feature for Visual Studio users, and can be a major timesaver when navigating large, complex codebases. If you’re ever navigating a complex codebase, and you forget the path you took to get where you are, try using these buttons to retrace your steps. Once you know the feature exists and get used to using them, they can greatly minimize cognitive load and keep your brain free to focus on your real objective.