
Setting up an Ubuntu Desktop VM with Oracle VirtualBox
This guide shows how to install Ubuntu Desktop on VirtualBox running on Windows 11, though the process is similar for other host systems.
New to virtual machines? You may be interested in my Introduction to Virtual Machines for Personal Use .
Software developers and other tech enthusiasts love to tinker with things. Operating systems included. Even though I do most of my work on a Windows PC, I’ve usually got a physical Linux machine of some kind running too. I currently have Manjaro Linux installed on an old laptop. When I want to test different types of software though, it can sometimes be faster and more convenient to use a virtual machine.
Since I am a .NET developer and do most of my work on Windows, I like to occasionally set up Linux virtual machines for self-education. It’s good to have at least an idea of how other operating systems work. It’s also sometimes much easier to install certain software on a Linux distribution than on Windows, thanks to the excellent package management capabilities.
These instructions may seem simple and redundant. The problem is that there are minor details that I often forget, and that always trip me up when installing new virtual machines using VirtualBox. Especially when I haven’t used VirtualBox in a long time. So, this post will serve as my reference going forward. I hope it helps others too.
These instructions are for Ubuntu Desktop. Looking for a server version? You can find that here: Setting up an Ubuntu Server VM with Oracle VirtualBox
Tested with: VirtualBox 7.1.12, Windows 11 (24H2 at time of writing), and Ubuntu Desktop 24.04.3 LTS.
Install VirtualBox
Download and install Oracle VirtualBox for your host operating system.Download Ubuntu Desktop ISO
Get the latest Ubuntu Desktop ISO (e.g., 24.04 LTS).Create New VM in VirtualBox
- Name: e.g., “Ubuntu”
- Type: Linux → Ubuntu (auto-filled in most cases)
- ISO Image: select the downloaded Ubuntu ISO
Configure Resources
- Memory: at least 2048 MB (more recommended if available)
- CPUs: 1+ (don’t over-allocate from your host)
- Disk: at least 25 GB (30 GB recommended)
Set Up Unattended Install
- Enter a username and password
- Verify hardware/disk settings
- Click Finish
Run Installation
VirtualBox will launch and complete the Ubuntu install automatically.Log In
Use the password you set during VM creation.Start Using Ubuntu
Open a terminal with Ctrl + Alt + T and you’re ready to explore.
I’m working on a Windows 11 host for these instructions, but as Oracle VirtualBox is cross-platform, the instructions should be very similar on other host operating systems as well.
To get started, download and install Oracle VirtualBox . Make sure you download the version for your host operating system. So, for example, if you’re going to install VirtualBox on a Windows PC, then download the version for Windows hosts. For Linux, download the appropriate version for your Linux distribution.
The next step is to download the image file for the version you want to install. For these instructions, we’ll be using Ubuntu 24.04.3 LTS, which is the latest long-term support version available as of the date of this post. You can download the latest versions from Ubuntu .
NOTE: The ISO image file can be quite large. The ISO file I downloaded while working on these instructions was 5.9 GB. It may take some time to download. Make sure you have adequate space on your local machine’s hard drive before beginning the download. If you want to install a smaller version of Linux, you can try a distribution like Linux Lite. The ISO for Linux Lite 5.0 that can be downloaded here is 1.4 GB—significantly smaller than Ubuntu’s ISO file. The instructions for creating a Linux Lite VM for Oracle VirtualBox are very similar to an Ubuntu installation.
Navigate to the Ubuntu desktop downloads page and click the Download button. This will begin the download of the ISO file.
Once you have the ISO file downloaded, it’s a good idea to save it and move it to a more permanent location on your desktop. I like to put my ISO files on my PC’s D drive, which has 1 TB of disk space. By doing that, you don’t have to download the file again in the future when you want to create additional virtual machines.
Launch the Oracle VirtualBox program. You will see a screen similar to the following:
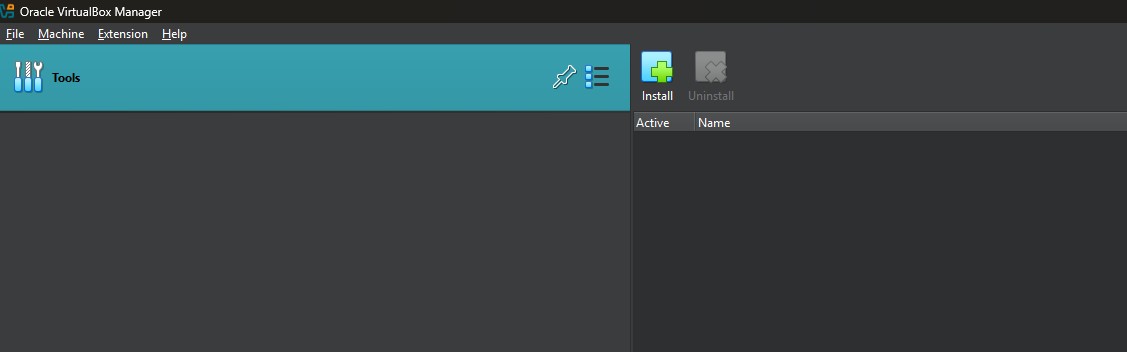
Oracle VirtualBox Manager
In the example image, there are no VMs yet.
Click Machine > New …
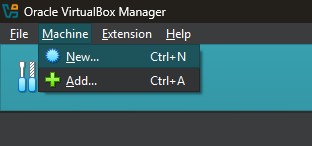
Machine > New… Menu
The Create Virtual Machine dialog will display.
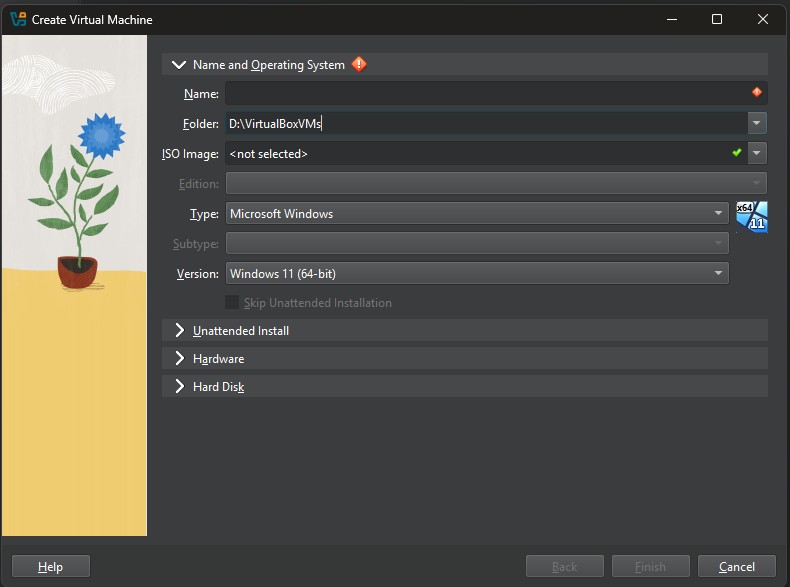
Create Virtual Machine Dialog
There are a few fields that must be completed before the virtual machine can be created.
Enter a name in the Name field. This can be something as simple as “Ubuntu”, or if you have a specific purpose, such as learning a technology, you could maybe use something like “Ubuntu-Angular” or “Ubuntu-OpenSearch”. For these instructions, I’m just going to use “Ubuntu”.
VirtualBox is smart enough to know that when I enter the name “Ubuntu”, I want a Linux virtual machine. It automatically changes the Type, Subtype, and Version fields for me. However, you may need to change these yourself.
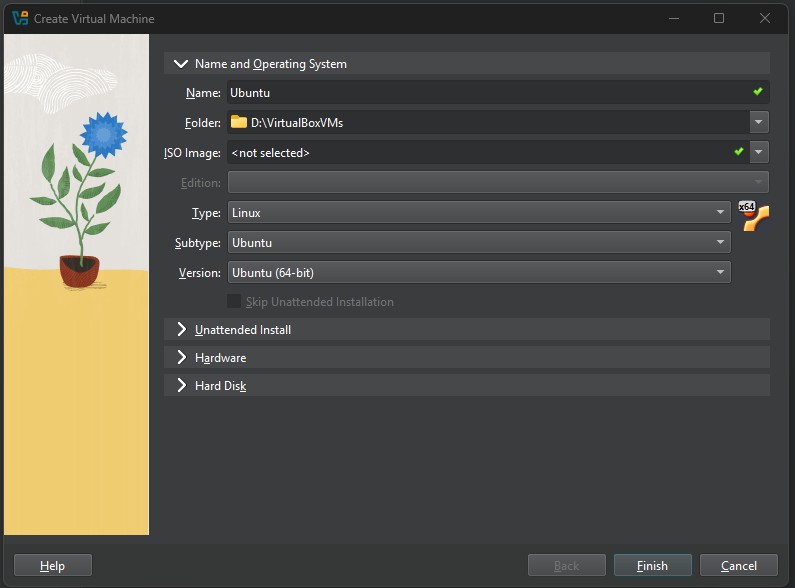
Fields Automatically Filled
Finally, we’ll use the ISO Image field to browse to and select the ISO image we downloaded in Step 2.

ISO Image Selected
After selecting the ISO image, notice that a warning icon displays on the Unattended Install section. We’ll need to address this if we want to run an unattended install. Click the Unattended Install heading to expand that section.
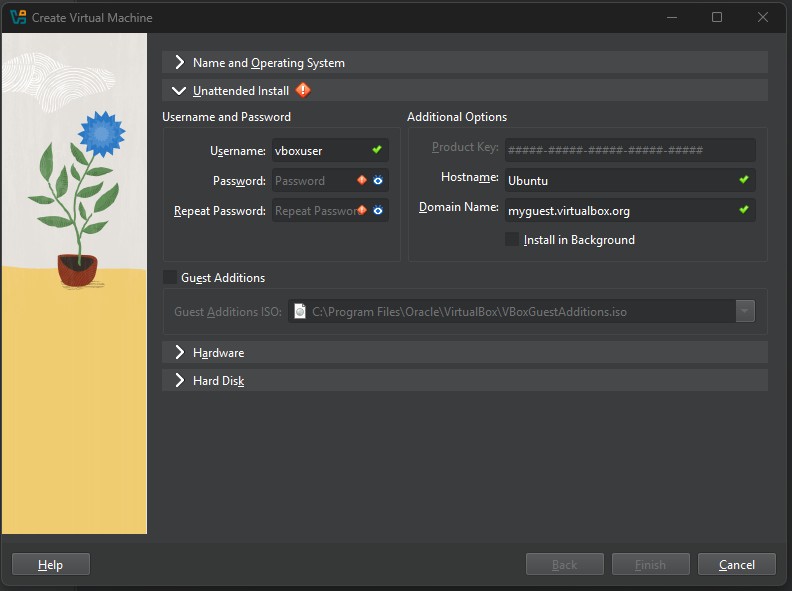
Unattended Install Panel
The unattended install is a new option since I last used VirtualBox. This is a convenient option if you just want to get a VM going quickly and don’t want to have to sit and click all the options during the installation process.
A password for the VirtualBox user is required. Enter the password in the Password and Repeat Password fields.
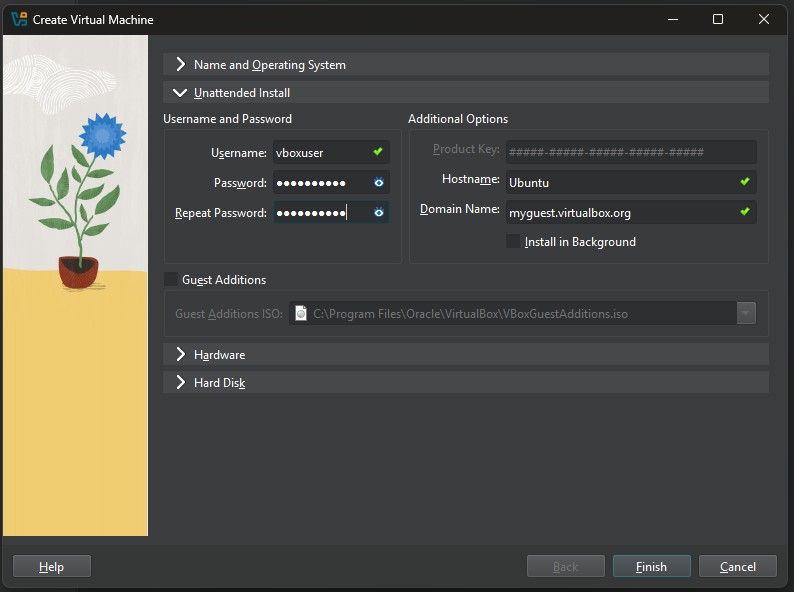
Password Entered
Make sure you note the password and keep it in a safe location. It’s a bummer to have a project going on a machine, virtual or physical, and forget the password you used when the admin user for the machine was created. I am speaking from actual experience.
NOTE: If you’re writing code on a virtual machine, make sure to use a version control solution like GitHub for your source code. Or, at the very least, make backups of your code and store them somewhere safe. Version control is the recommended solution.
After the password is entered into the two required fields, the Finish button is enabled. Before we click that button, though, we want to also make sure we select the Guest Additions checkbox. This will install VirtualBox Guest Additions as part of the installation process. Guest Additions enable features such as shared clipboard and Drag’n’Drop, but you’ll still need to activate these options later in the VM settings.
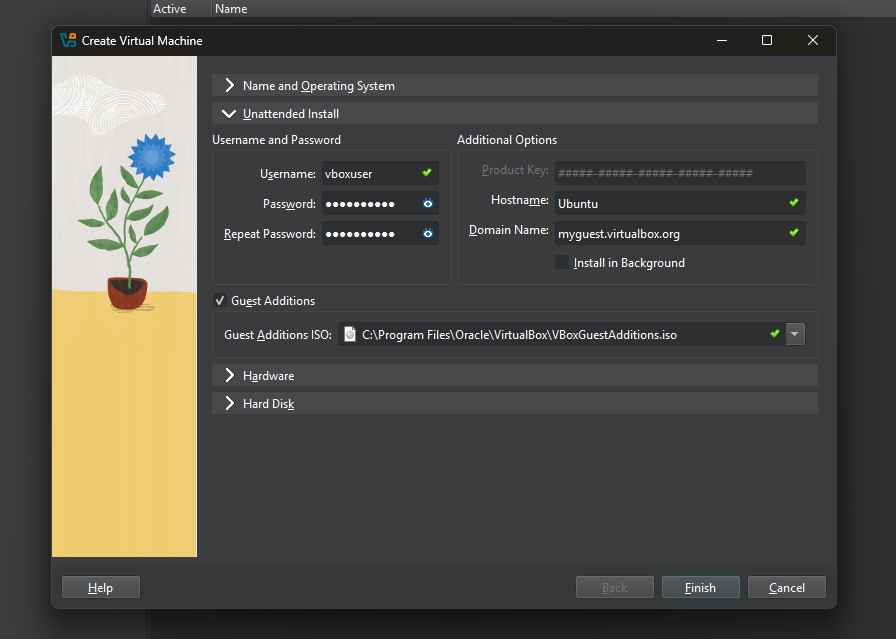
Guest Additions Checked
Now that we’ve completed the Unattended Install settings, we can look at the Hardware and Hard Disk sections.
Click the Hardware section to expand it:
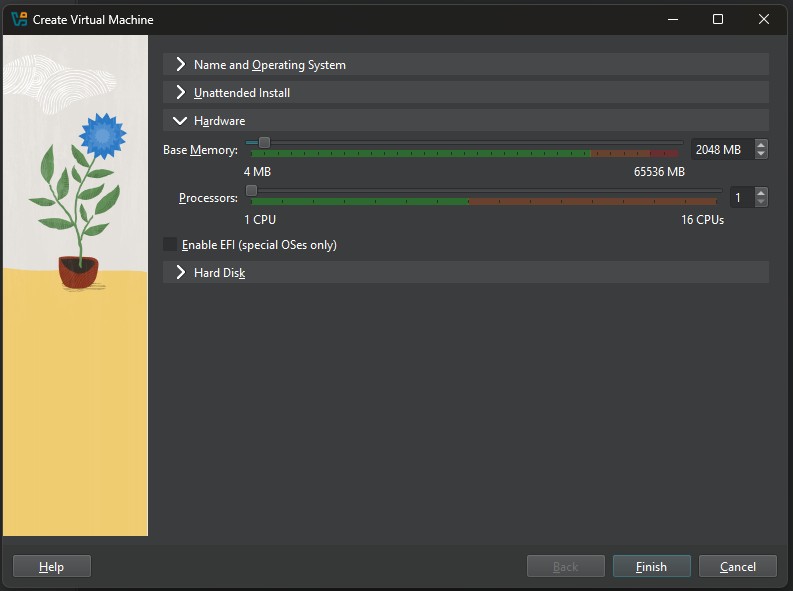
Hardware Section
Note the amount of Base Memory and Processors the Virtual Machine will use when it is created. You want to make sure this is high enough to support Ubuntu’s requirements, but also doesn’t exceed your host system capacity.
On the Ubuntu Download page from Step 2, the following are listed as the System Requirements for Ubuntu Desktop:
- 2 GHz dual-core processor or better
- 4 GB system memory
- 25GB of free hard drive space
VirtualBox defaulted the Base Memory to 2048 MB. I have enough capacity on my machine to support this.
It also defaulted the Processors to 1 vCPU. VirtualBox defaults to 1 CPU core. Most modern hosts have multiple cores, so you can safely assign 2 or more as long as you leave some cores for the host OS.
Assigning more memory or CPUs can improve performance of the VM, but may slow down your host system if set too high.
Click the Hard Disk section header to expand that section:
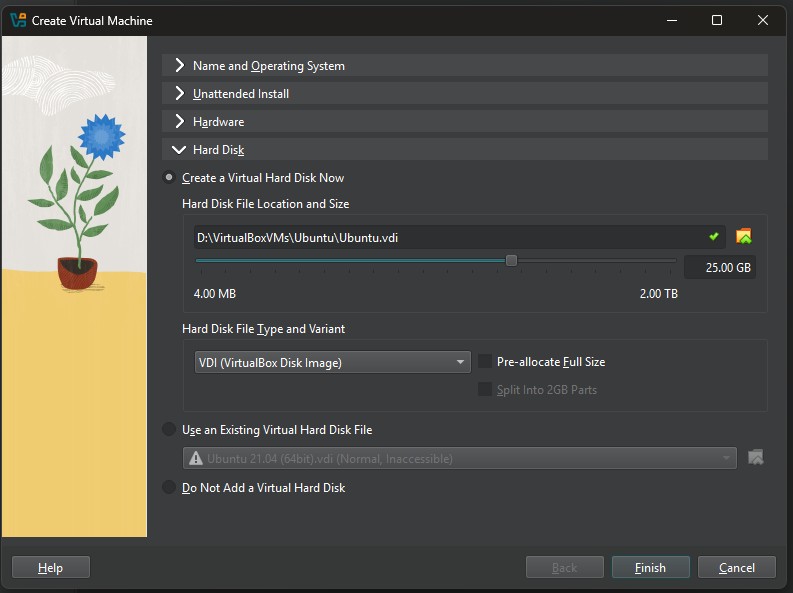
Hard Disk Section
VirtualBox defaulted to 25GB of hard disk space. This is the minimum required for Ubuntu. I have enough space on the hard drive the virtual machine will be created on, so I’m going to increase that to 30GB by typing 30.0 in the size field. You can also use the slider to increase or decrease the size.
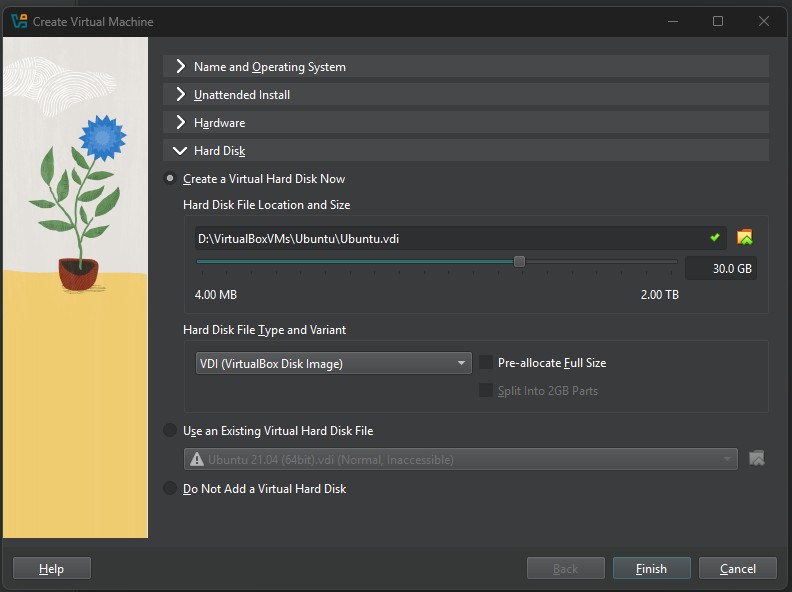
Hard Disk Size Increased
RAM, CPU and disk size can be adjusted after the VM is created. Base Memory and Processor Count can be adjusted up or down while the VM is powered off. Disk size is a little more complicated. VirtualBox allows disk size to be increased later. Shrinking disks is possible but much more complex and not recommended. If you’re unsure, start with the smallest setting you think you will need for these settings. Then you can adjust later.
You’ll see there are other options beyond the scope of this tutorial. For now, we’ve got everything we need.
Click the Finish button to start the unattended installation.
If everything is working correctly, VirtualBox will automatically start the unattended installation. After a few seconds, the preview will display in the upper right corner:
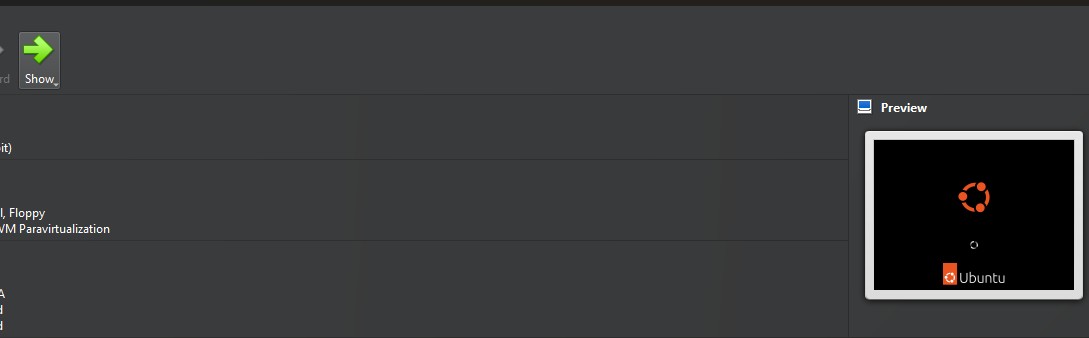
Virtual Machine Preview
A new window will also be created for the VirtualBox VM itself.
If the VM window is not visible, look for an icon like this in the taskbar:
Virtual Machine Icon
You can click on this icon to see the installation as it is automatically completed:
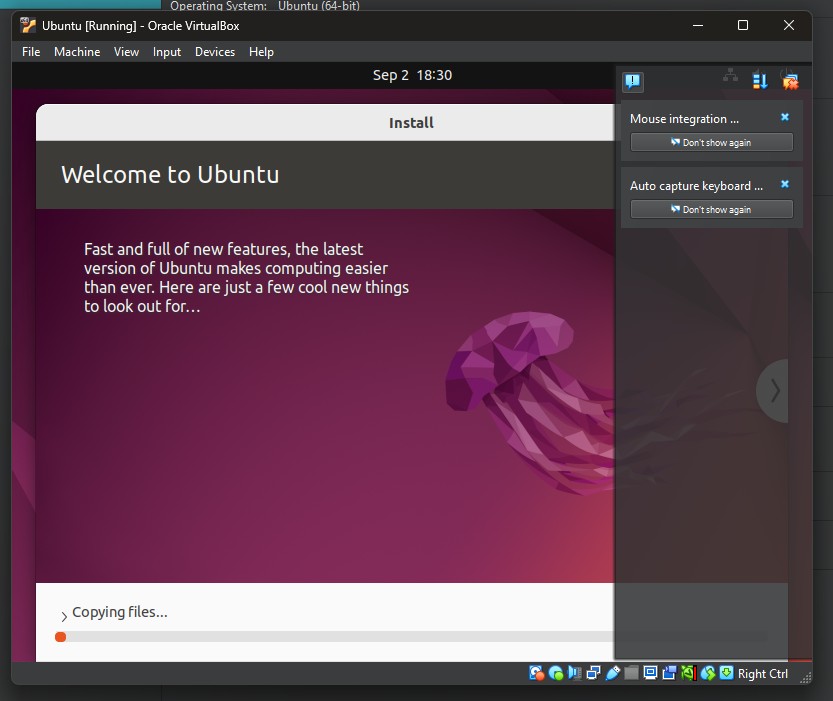
Virtual Machine Window Running Unattended Install
The installation will take a few minutes. This time may vary depending on your system’s performance. On my machine, the installation reached the following point after about 8 minutes:
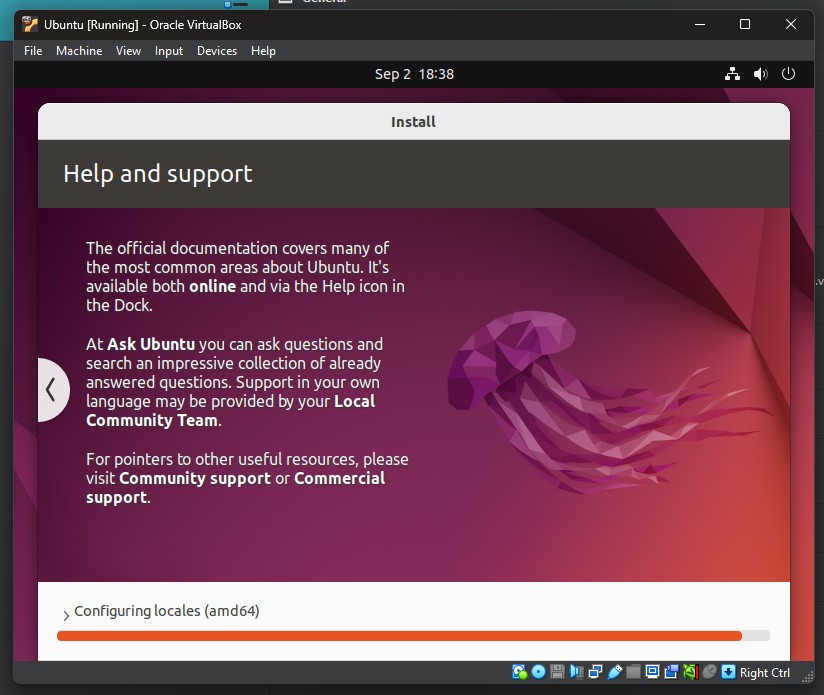
Virtual Machine Window Install Progress
Once completed, the virtual machine will start on the user login screen, as shown below:
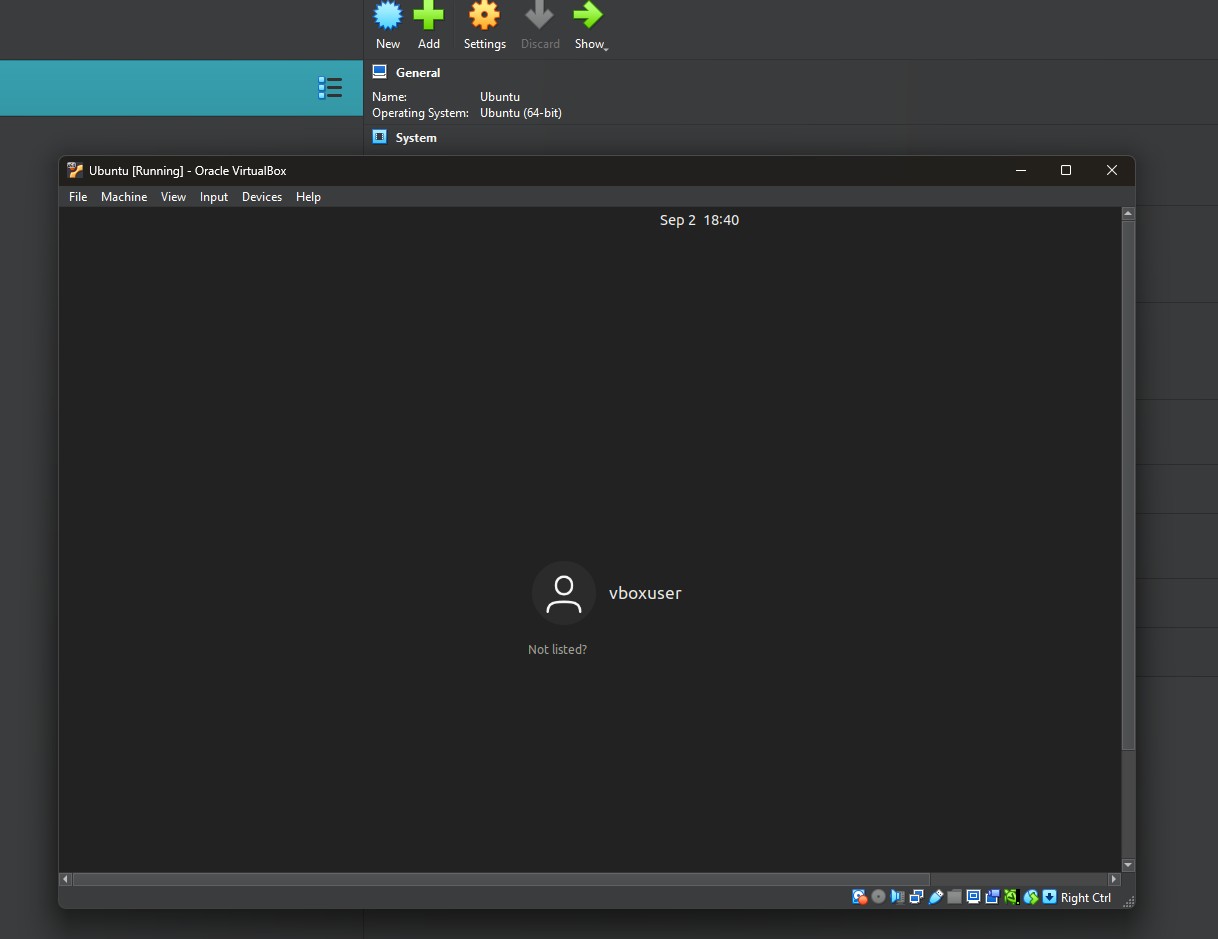
Installation Completed
Click the vboxuser icon and enter the password created in Step 4.
NOTE: At this point, clipboard sharing will not be enabled. You will have to type the password manually.
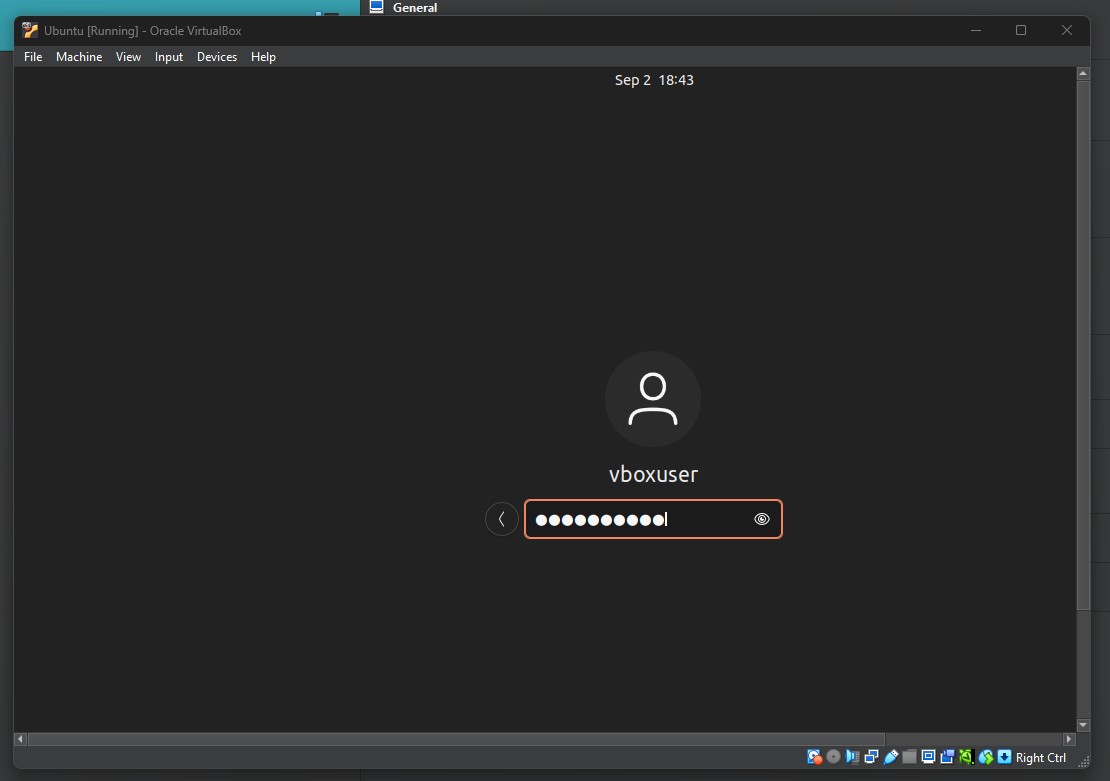
Enter User Password
After logging in, you’ll be presented with some prompts to complete the setup, starting with “Connect Your Online Accounts”.
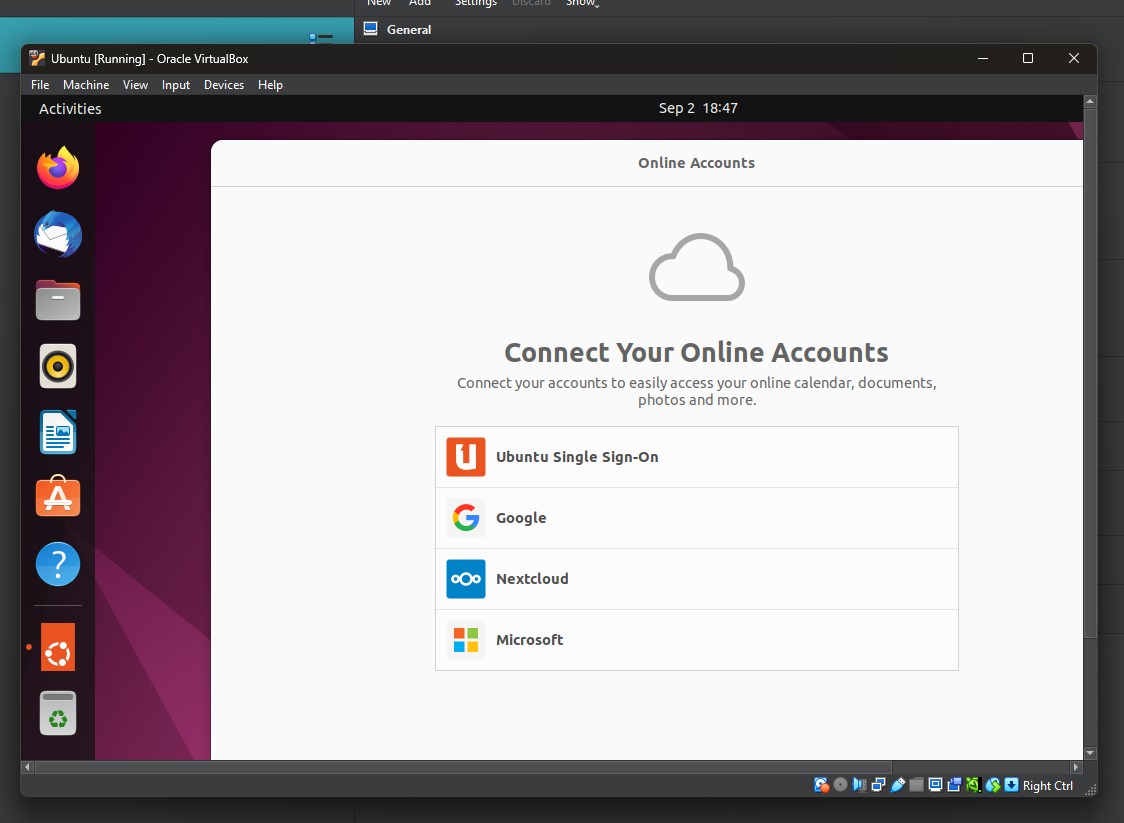
Connect Your Online Accounts Prompt
Follow the prompts to complete the steps. After completion, a dialog with the title “Ready to go” indicating the setup is complete should display:
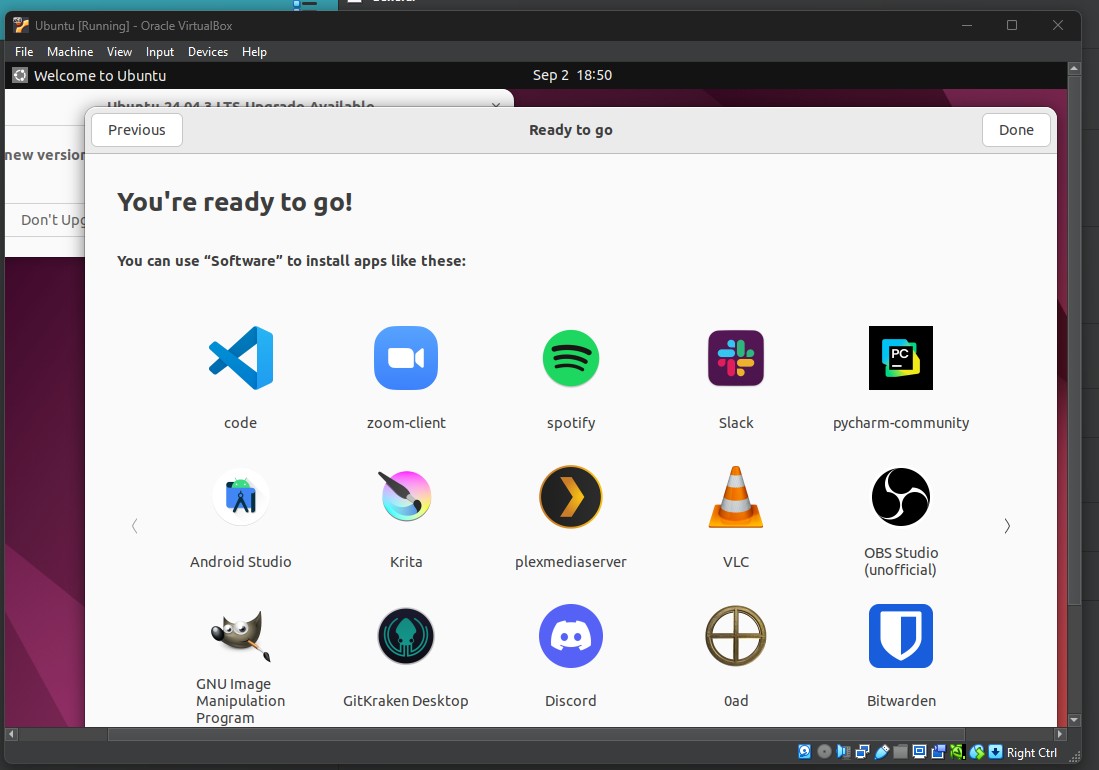
Virtual Machine Ready to Use
Click Done to close the dialog.
You may also see an Upgrade dialog. You can choose the appropriate option from this dialog. For these instructions, I’m going to choose not to upgrade.
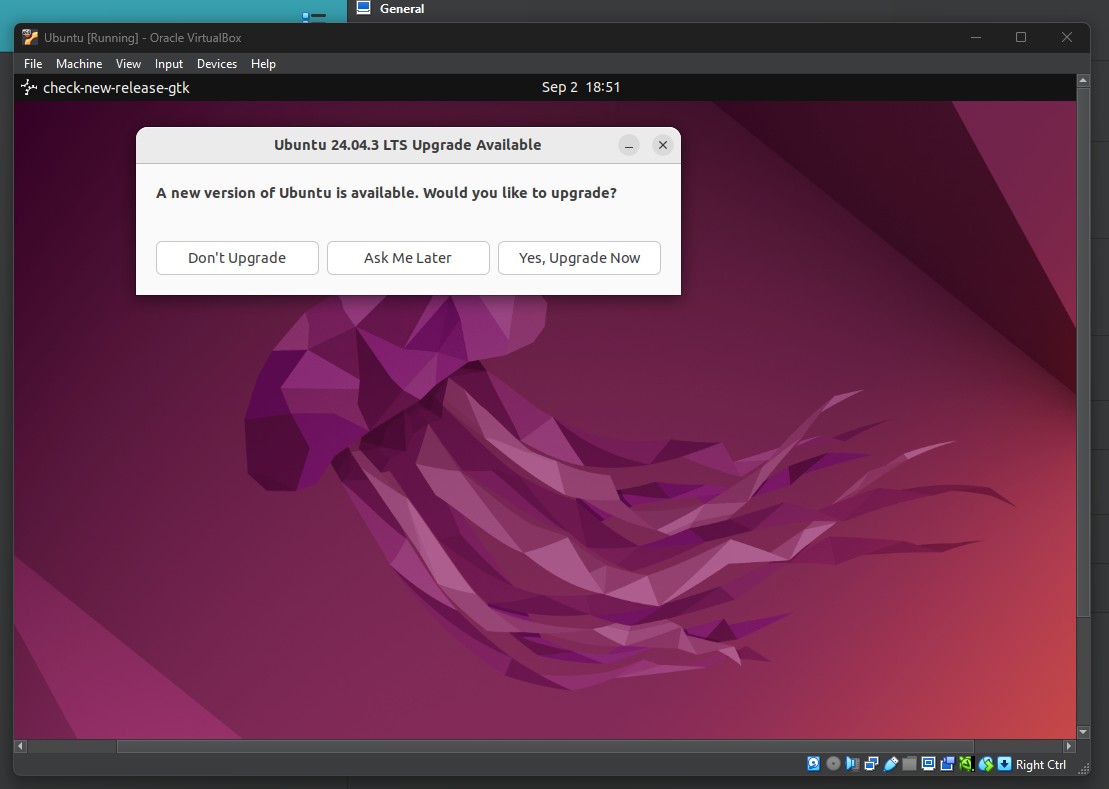
Ubuntu Upgrade Prompt
Now that Ubuntu is installed, it’s ready to be used like you would use an Ubuntu desktop installation on physical hardware.
We can press Ctrl + Alt + T to open a terminal. Make sure the cursor is inside the VM window when you press the key combination.
I’ve done so and run the date command to output the current system date.
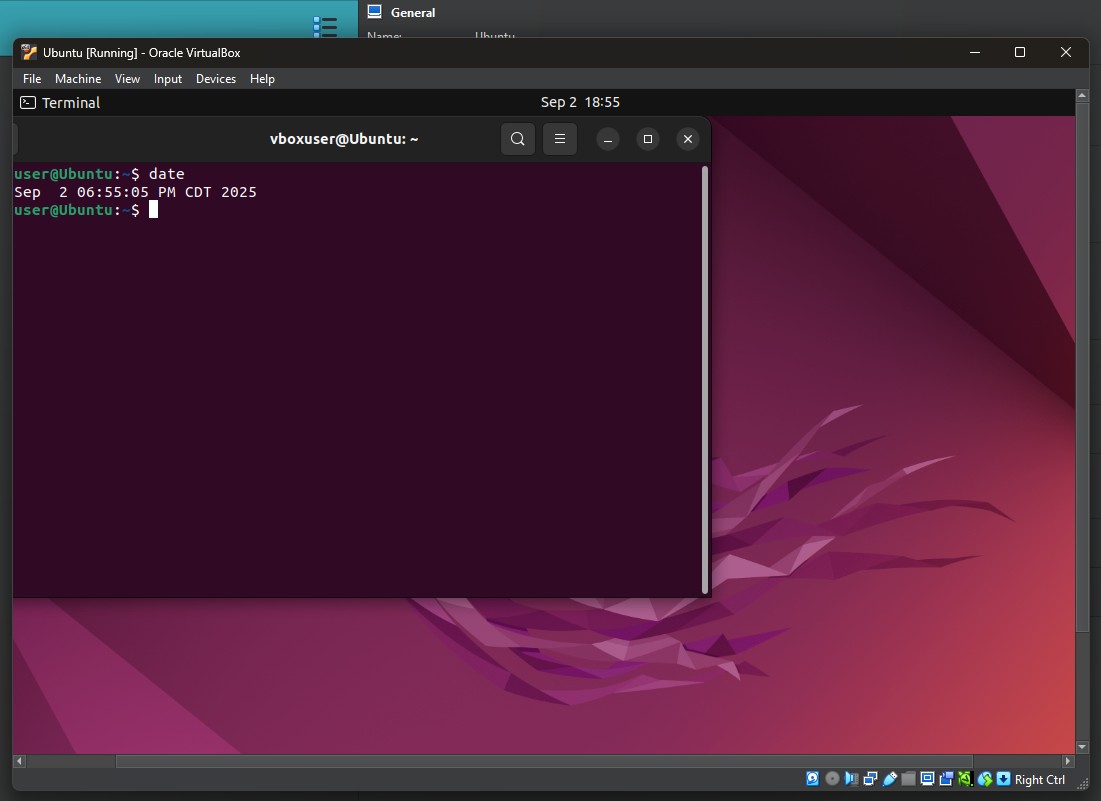
Terminal Window with Date Command Output
In Step 4, we installed Guest Additions to enable features like the shared clipboard. However, an additional step is required to activate these features.
Click Machine > Settings…
On the General menu, click the Advanced tab.
For these options, remember: Host refers to your physical computer, and Guest refers to the VM.
Change the Shared Clipboard drop-down to the desired selection. The options are:
- Host to Guest - If you want to be able to paste data from the host’s clipboard to the virtual machine.
- Guest to Host - If you want to be able to paste data from the virtual machine’s clipboard to the host.
- Bidirectional - If you want to be able to paste data from either clipboard to the other system.
Set the Drag’n’Drop drop-down to the desired option. The options are the same as the Shared Clipboard.
NOTE: Drag’n’Drop can be inconsistent depending on host and guest OS versions. If it doesn’t work, Shared Clipboard is usually more reliable. I typically do not enable this when I’m using VirtualBox.
This completes the instructions for installing an Ubuntu Desktop VM on a Windows 11 host using Oracle VirtualBox with an unattended installation process. Future posts on this blog that use Ubuntu or other Debian-based Desktop VMs for the examples provided will reference these instructions.
Ready to do more with your new Ubuntu VM?
- Try setting up a Python Development Environment .