
Setting up an Ubuntu Server VM with Oracle VirtualBox
This guide shows how to install Ubuntu Server on VirtualBox running on Windows 11, though the process is similar for other host systems.
New to virtual machines? You may be interested in my Introduction to Virtual Machines for Personal Use .
In my previous post, Setting up an Ubuntu Desktop VM with Oracle VirtualBox , we looked at setting up an Ubuntu Desktop VM in Oracle VirtualBox. In this post, we’ll look at setting up an Ubuntu server.
As I mentioned in my desktop VM creation tutorial, there are minor details that I often forget, and that always trip me up when installing new virtual machines using VirtualBox. Especially when I haven’t used VirtualBox in a long time. So, this post will serve as my reference going forward. I hope it helps others too.
Tested with: VirtualBox 7.1.12, Windows 11 (24H2 at time of writing), and Ubuntu Server 24.04.3 LTS.
- Windows PC with virtualization enabled .
- Internet connection to download the ISO and updates.
- Sufficient host system resources to create the VM (at least 2 GB RAM and 25 GB disk space free).
Install VirtualBox
Download and install Oracle VirtualBox for your host operating system.Download Ubuntu Server ISO
Get the latest Ubuntu Server ISO (e.g., 24.04.3 LTS).Create New VM in VirtualBox
- Name: e.g., “UbuntuServer”
- Type: Linux → Ubuntu (auto-filled in most cases)
- ISO Image: select the downloaded Ubuntu Server ISO
- Skip unattended installation
Configure Resources (RAM, CPU, disk)
Start the VM
Launch the VM and begin the manual installation process.Follow Installer Prompts
- Select language and keyboard layout
- Choose installation type (Ubuntu Server)
- Configure network and proxy (defaults are fine)
- Accept default mirror and storage setup
- Enter profile details (username/password)
- Skip Ubuntu Pro
- Skip SSH/snaps (can add later)
Complete Installation & Reboot
Wait for installation to finish, then reboot the VM.If prompted to remove the installation medium, press Enter.
First Login
Log in with the username and password you created.Start Using Ubuntu Server
You’ll land at the shell prompt, ready to run commands (e.g.,date).
I’m working on a Windows 11 host for these instructions, but as Oracle VirtualBox is cross-platform, the instructions should be very similar on other host operating systems as well.
To get started, download and install Oracle VirtualBox . Make sure you download the version for your host operating system. So, for example, if you’re going to install VirtualBox on a Windows PC, then download the version for Windows hosts. For Linux, download the appropriate version for your Linux distribution.
The next step is to download the image file for the version you want to install. For these instructions, we’ll be using Ubuntu 24.04.3 LTS, which is the latest long-term support version available as of the date of this post. You can download the latest versions from Ubuntu .
NOTE: The ISO image file can be quite large. The ISO file I downloaded while working on these instructions was 3 GB. It may take some time to download. Make sure you have adequate space on your local machine’s hard drive before beginning the download.
Navigate to the Ubuntu server downloads page and click the Download button. This will begin the download of the ISO file.
Once you have the ISO file downloaded, it’s a good idea to save it and move it to a more permanent location on your PC. I like to put my ISO files on my PC’s D drive, which has 1 TB of disk space. By doing that, you don’t have to download the file again in the future when you want to create additional virtual machines.
Launch the Oracle VirtualBox program. You will see a screen similar to the following:
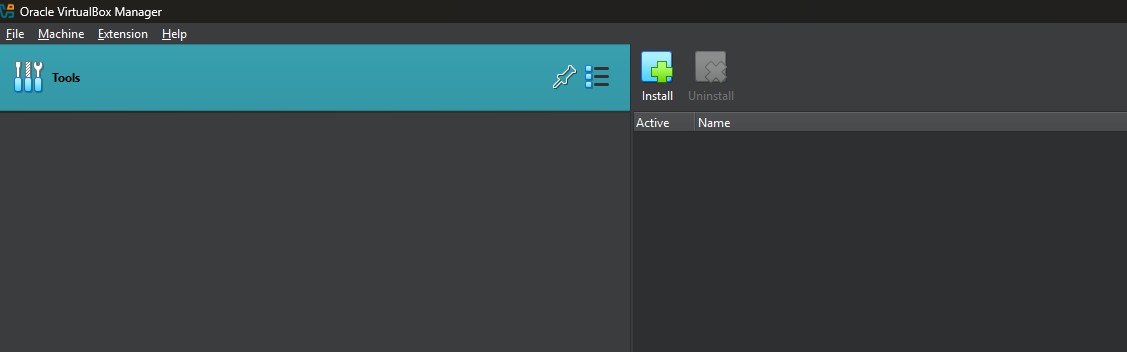
Oracle VirtualBox Manager
In the example image, there are no VMs yet.
Click Machine > New …
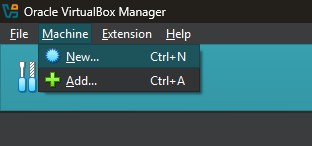
Machine > New… Menu
The Create Virtual Machine dialog will display.

Create Virtual Machine Dialog
There are a few fields that must be completed before the virtual machine can be created.
Enter a name in the Name field. This can be something as simple as “Ubuntu Server”, or if you have a specific purpose, such as learning a technology, you could maybe use something like “Ubuntu-OpenSearch” or “Ubuntu-PHP”. For these instructions, I’m just going to use “UbuntuServer”.
VirtualBox is smart enough to know that when I use the text “Ubuntu” in the Name, I want a Linux virtual machine. It automatically changes the Type, Subtype, and Version fields for me. However, you may need to change these yourself.
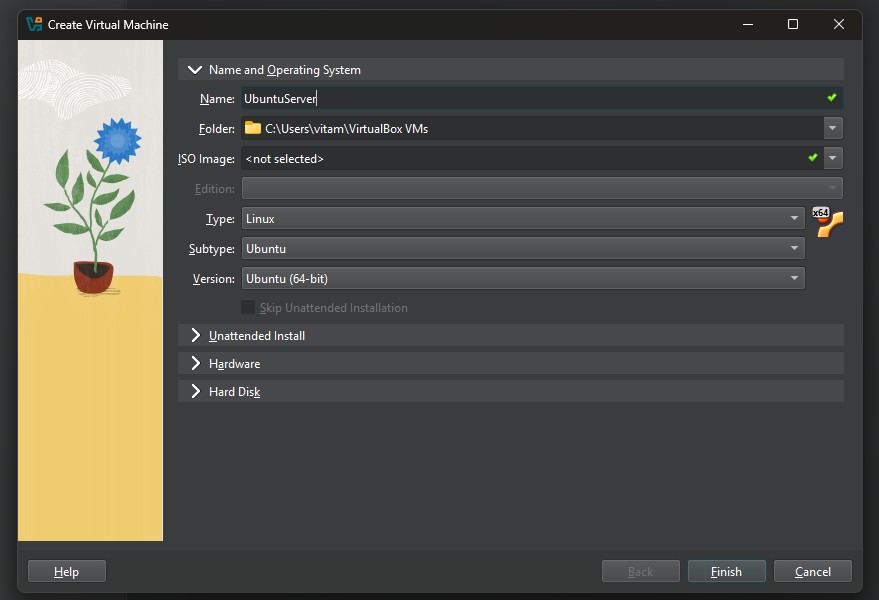
Fields Automatically Filled
Finally, we’ll use the ISO Image field to browse to and select the ISO image we downloaded in Step 2.
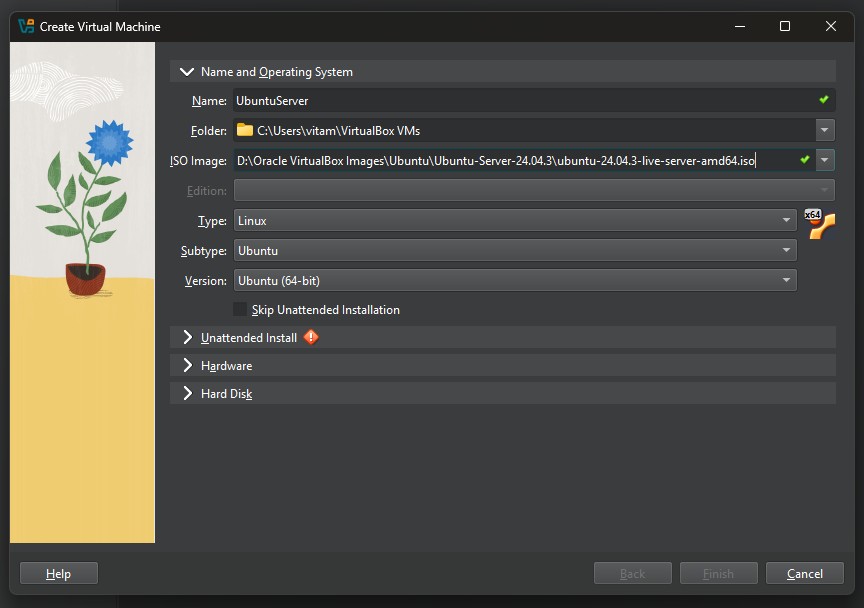
ISO Image Selected
After selecting the ISO image, notice that a warning icon displays on the Unattended Install section. Unattended install in VirtualBox is designed for desktop ISOs. With Ubuntu Server, it often fails or incorrectly configures user accounts, so a manual installation is more reliable. Select the Skip Unattended Installation checkbox.
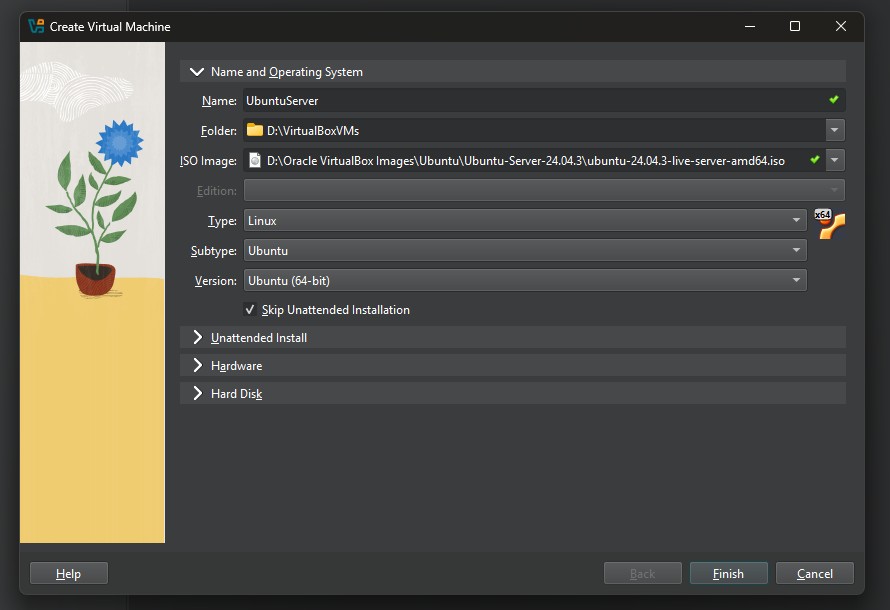
Skip Unattended Installation Checked
Click the Hardware heading to expand the Hardware section. The Base Memory is set to the default of 2048 MB, and the number of processors is set to 1 vCPU by default.
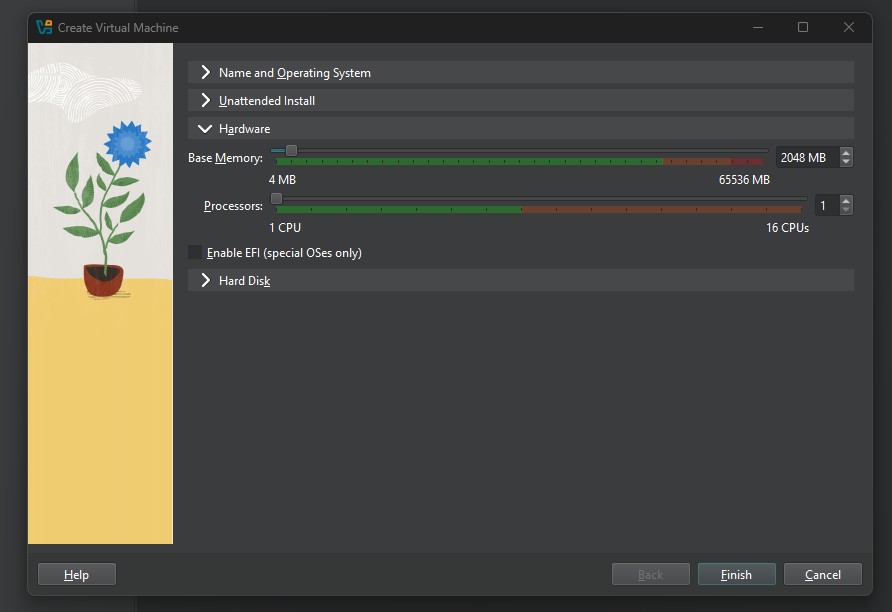
Hardware Section
On the Ubuntu Download page from Step 2, the following are listed as the System Requirements for Ubuntu Server:
- 1 GHz dual-core processor or better
- 1 GB system memory
- 5 GB of free hard drive space
VirtualBox defaulted the Base Memory to 2048 MB. I have enough capacity on my machine to support this.
VirtualBox defaults to 1 CPU core. Most modern hosts have multiple cores, so you can safely assign 2 or more as long as you leave some cores for the host OS.
Assigning more memory or CPUs can improve performance of the VM, but may slow down your host system if set too high.
Click the Hard Disk section header to expand that section:
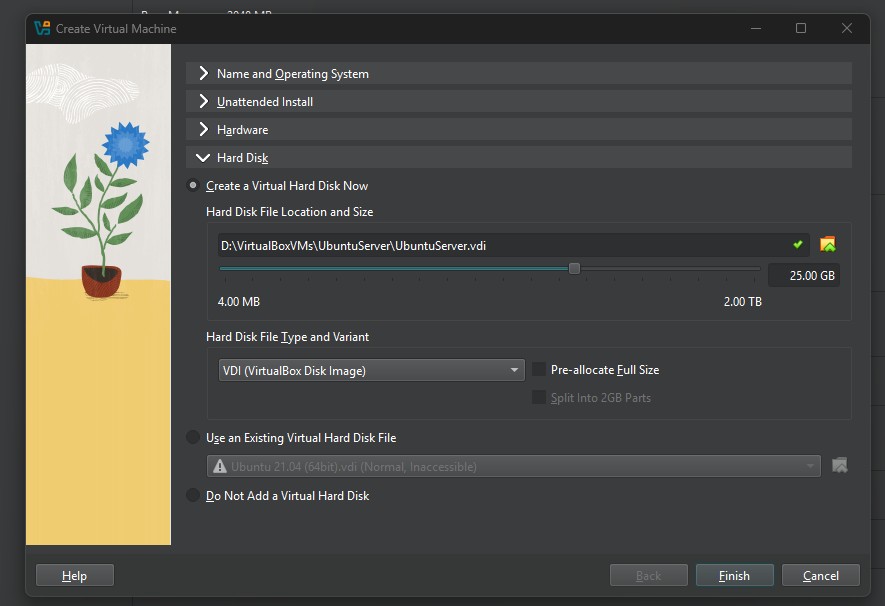
Hard Disk Section
VirtualBox defaulted to 25 GB of hard disk space. This is well over the 5 GB required for Ubuntu Server. So, I’m going to leave the default setting for this tutorial.
RAM, CPU, and disk size can be adjusted after the VM is created. Base Memory and Processor Count can be adjusted up or down while the VM is powered off. Disk size is a little more complicated. VirtualBox allows disk size to be increased later. Shrinking disks is possible but much more complex and not recommended. If you’re unsure, start with the smallest setting you think you will need for these settings. Then you can adjust them later.
You’ll see there are other options beyond the scope of this tutorial. For now, we’ve got everything we need.
Click the Finish button to complete the setup.
The server will now appear in VirtualBox:
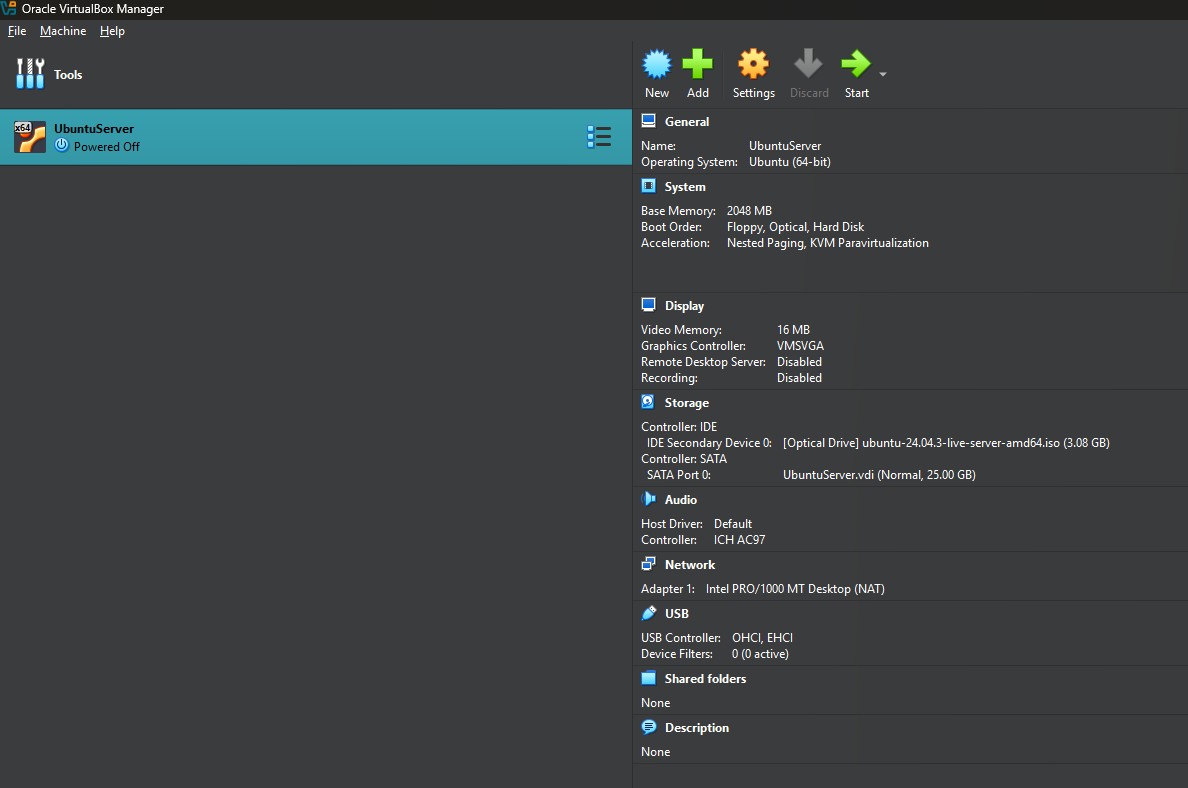
New Server Ready
The server is not yet ready to run. We need to complete the installation steps. To begin, select the server and click the Start button at the top of the VirtualBox user interface. Alternatively, you can also right-click on the server and select Start > Normal Start from the context menu.
The server will start and the installation process will begin. If you don’t see the server, look for the VirtualBox server icon in the taskbar and click it:
VirtualBox VM Icon
The server will start on the welcome page.
Use the up or down arrow keys to select your preferred language. Then press Enter to continue.
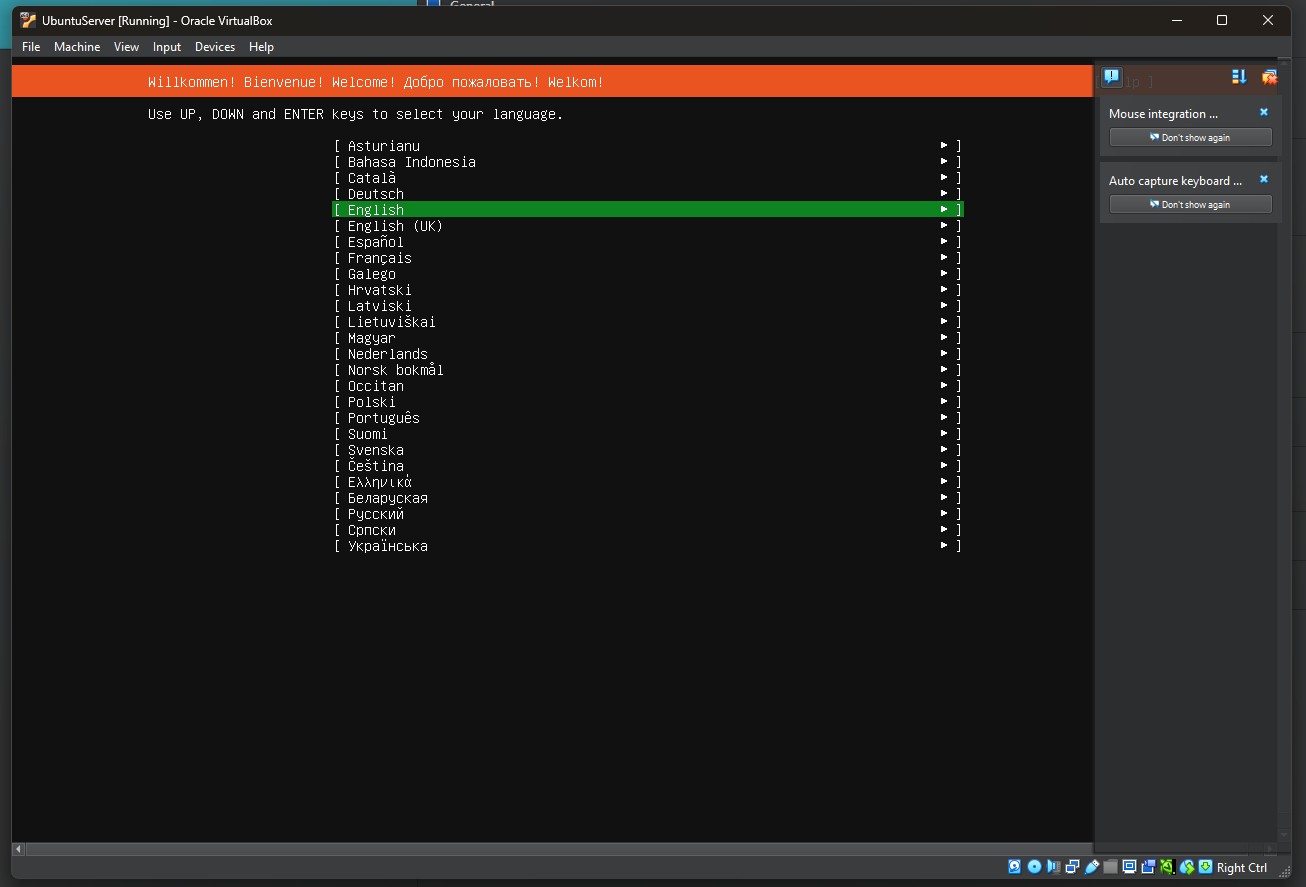
Language Selection Menu
The next step is to select the keyboard layout. Use the up or down arrow keys to move between fields. When focused on a drop-down, press the Enter key to expand the options in the drop-down. Then use the up or down arrows to navigate between drop-down options.
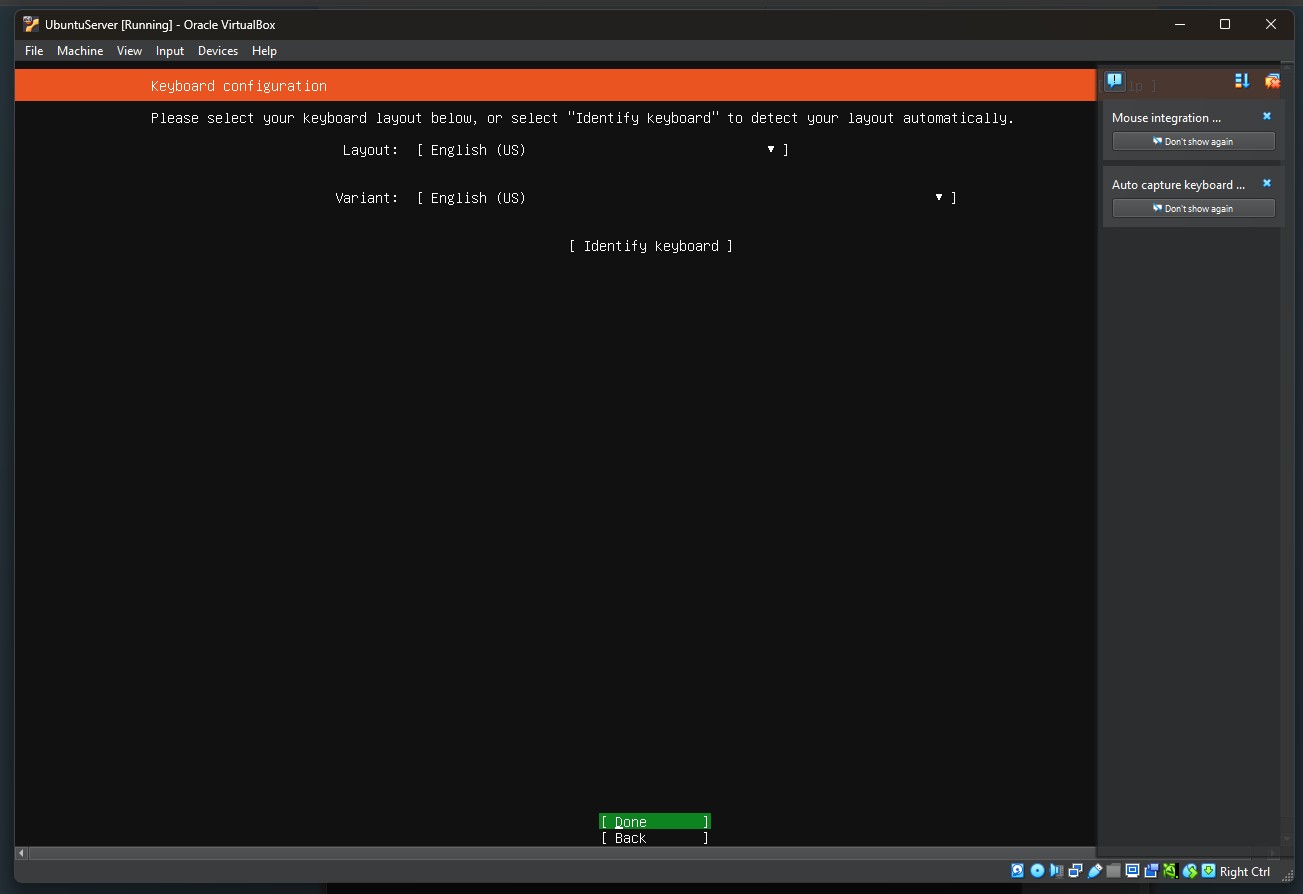
Keyboard Layout Selection
When your preferred keyboard layout is selected, press the down arrow to the Done option and press Enter to continue.
The next step is to choose the type of installation. The options are Ubuntu Server and Ubuntu Server (minimized).
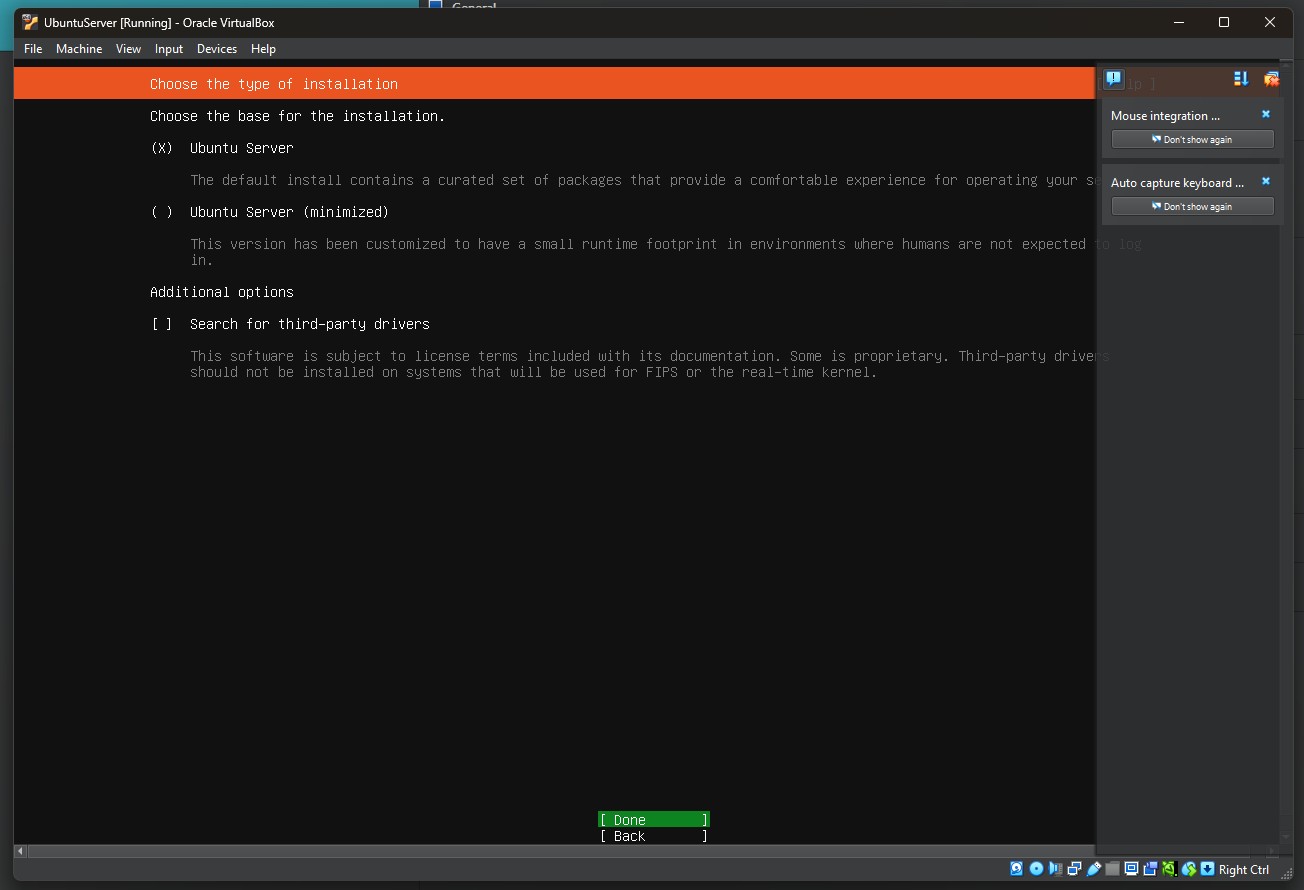
Server Installation Type Selection
For this tutorial, I’m going to select the default option of “Ubuntu Server.” This is the selection I recommend if you are creating this VM for educational purposes.
I’m also not going to select the option to search for third-party drivers, as they won’t be needed for this tutorial.
Select the Done option and press Enter to continue.
The next screen is network configuration.
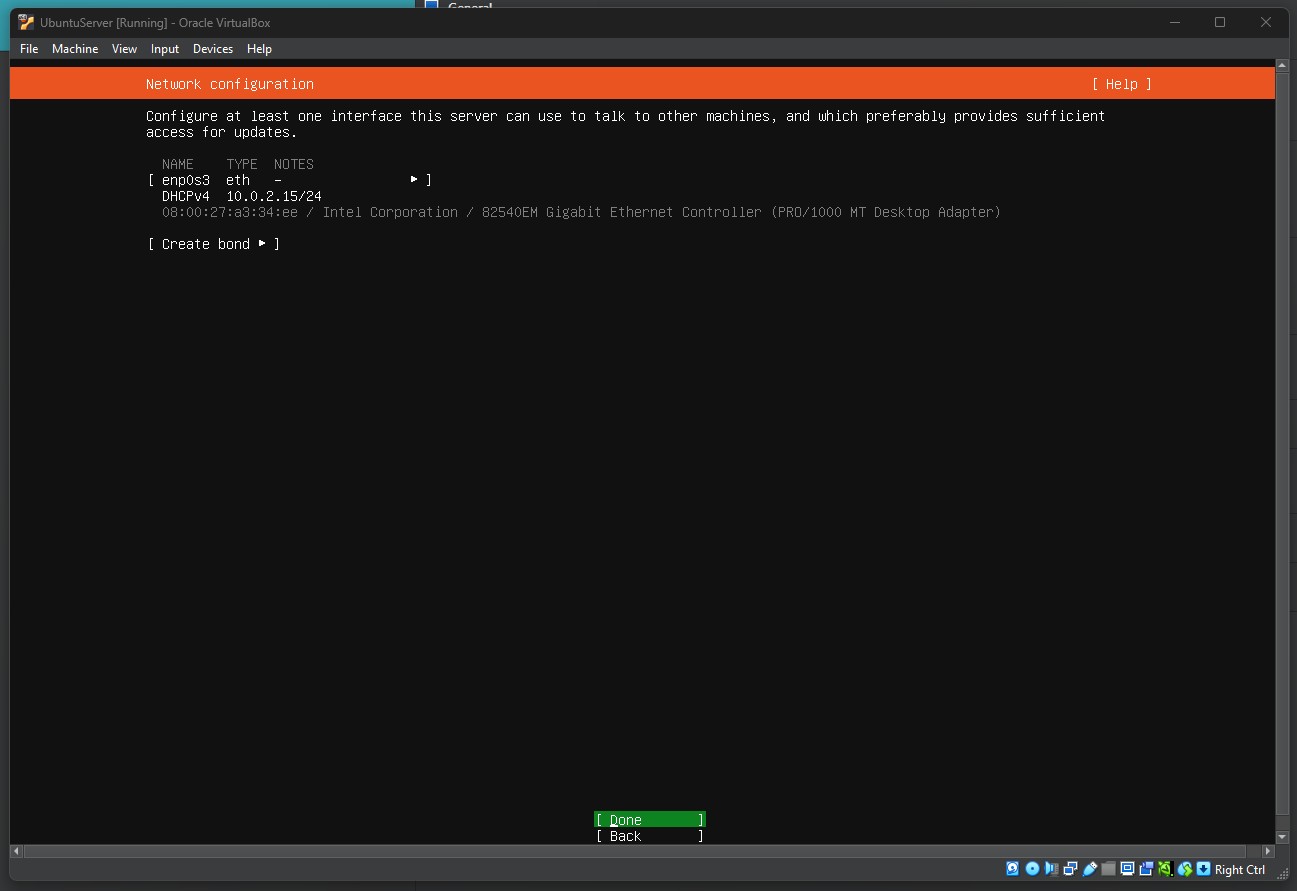
Network Configuration
If you have one network adapter on your host machine, as is the case on mine, then this should be selected automatically for you and no changes are required. By default, VirtualBox uses NAT networking, which lets the VM access the internet through your host. If you need the VM to be reachable from your host or LAN, you may later switch to ‘Bridged Adapter’ or ‘Host-Only Adapter’ in VM settings. Select the Done option to continue.
After network configuration, you will be prompted for proxy configuration.
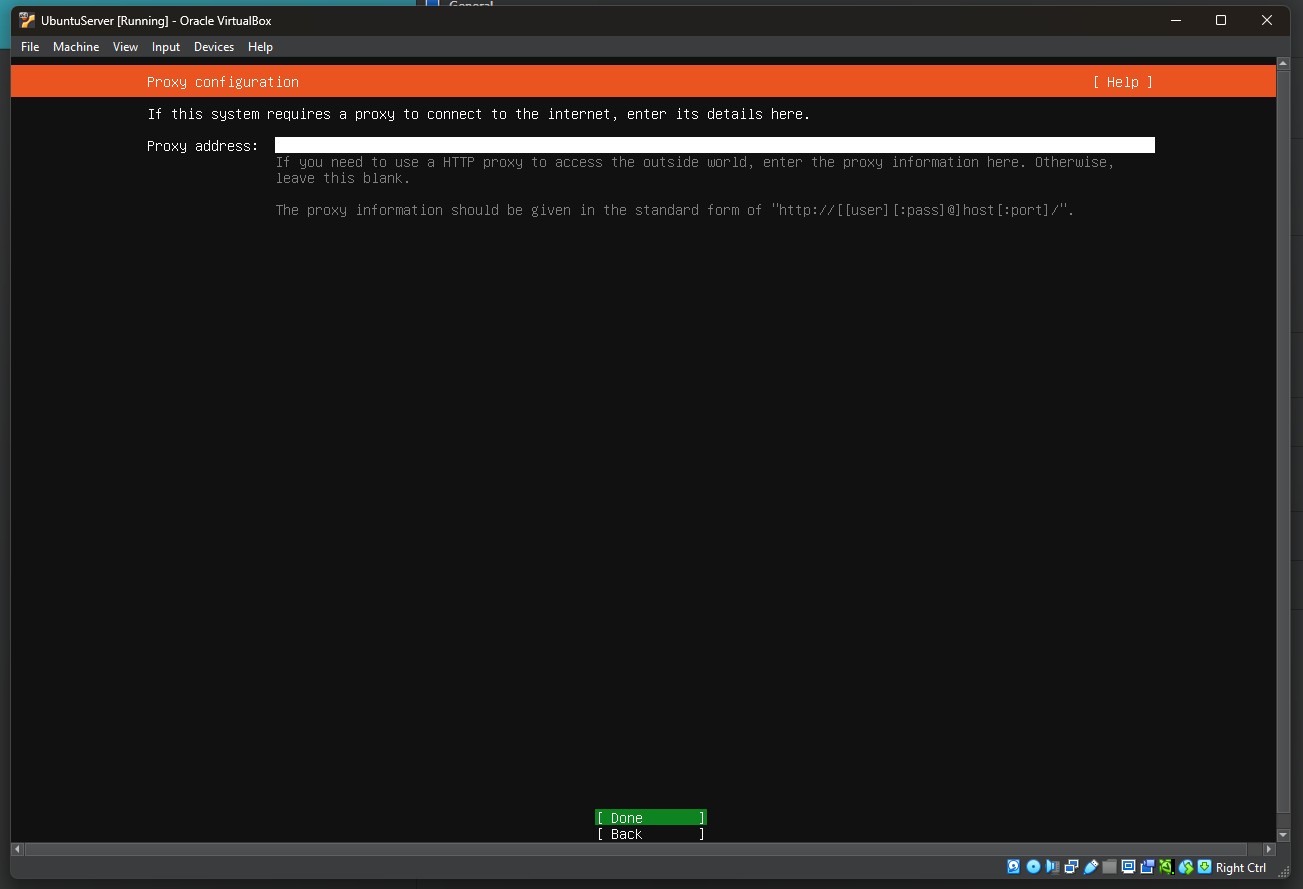
Proxy Configuration
Some networks require all outbound internet traffic to go through a proxy (for security/caching). If yours does, enter it here; otherwise leave blank.
Select the Done option and press Enter to continue.
The installation process will begin mirror configuration.
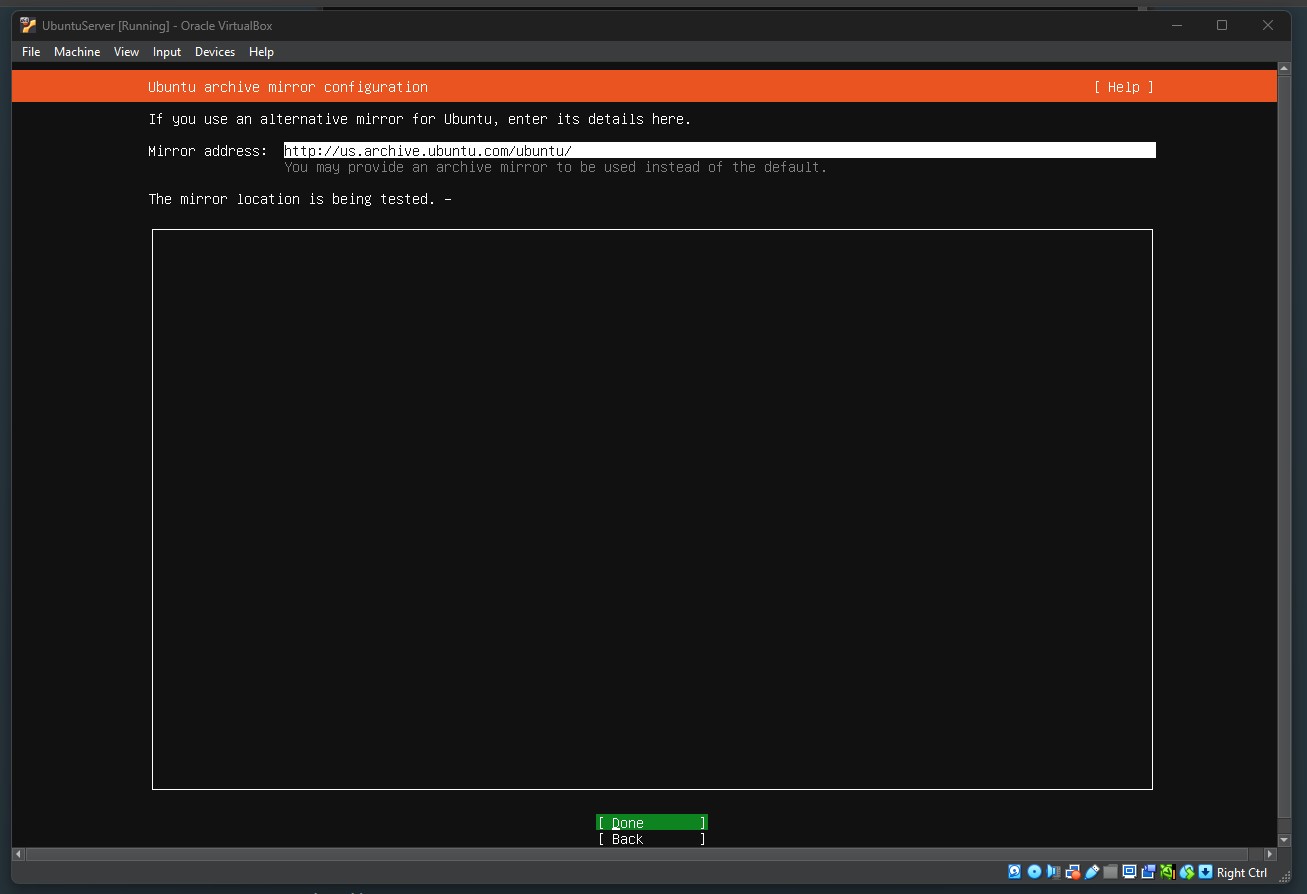
Mirror Configuration
The mirror is the server that the installation process will communicate with during the installation if any of the installation steps require connection to the internet. The Ubuntu installation process will test the mirror location. This may take a few minutes. If the installation process can connect to the mirror, you will see a screen like the following:
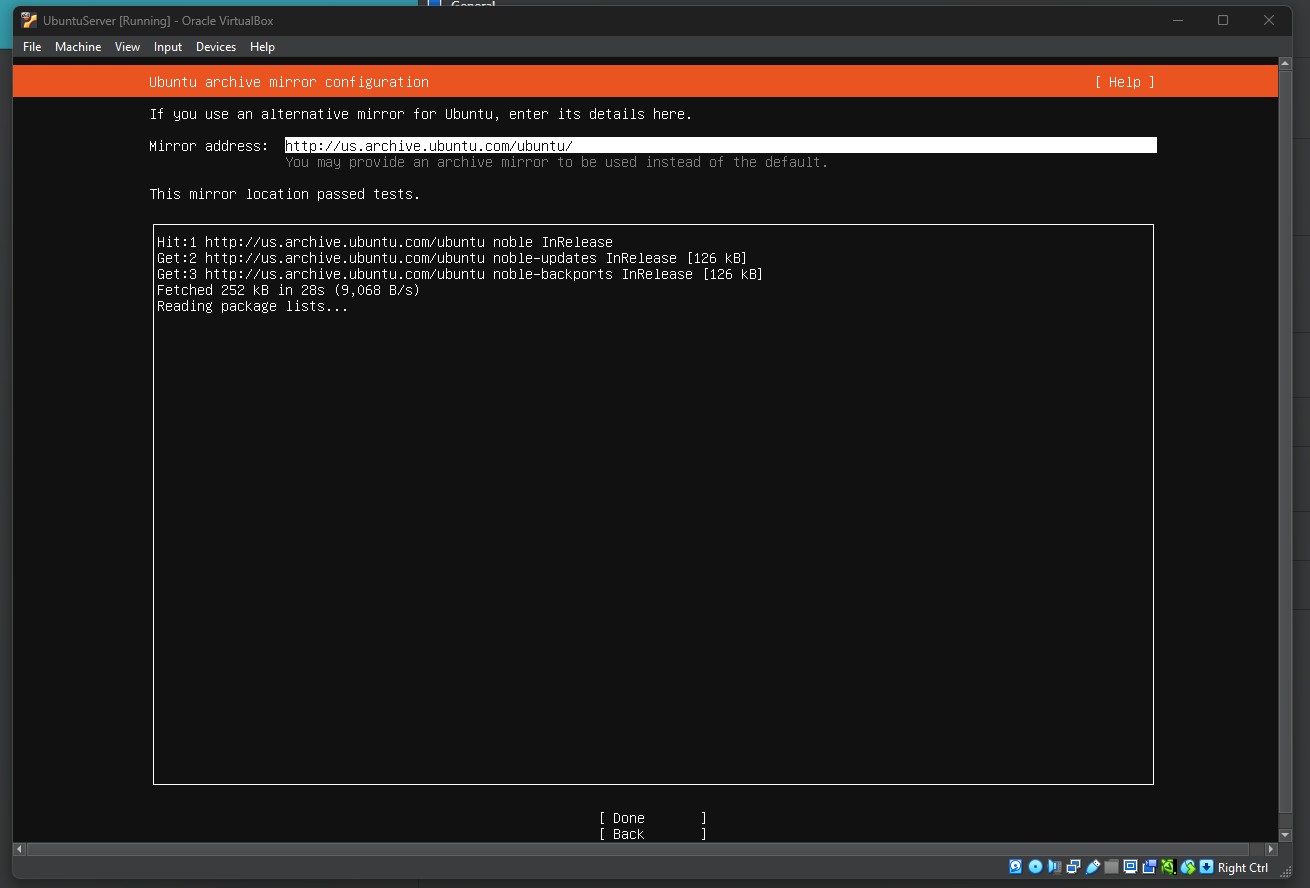
Mirror Test Passed
Select the Done option and press Enter to continue.
Next, the Guided Storage Configuration screen will display.
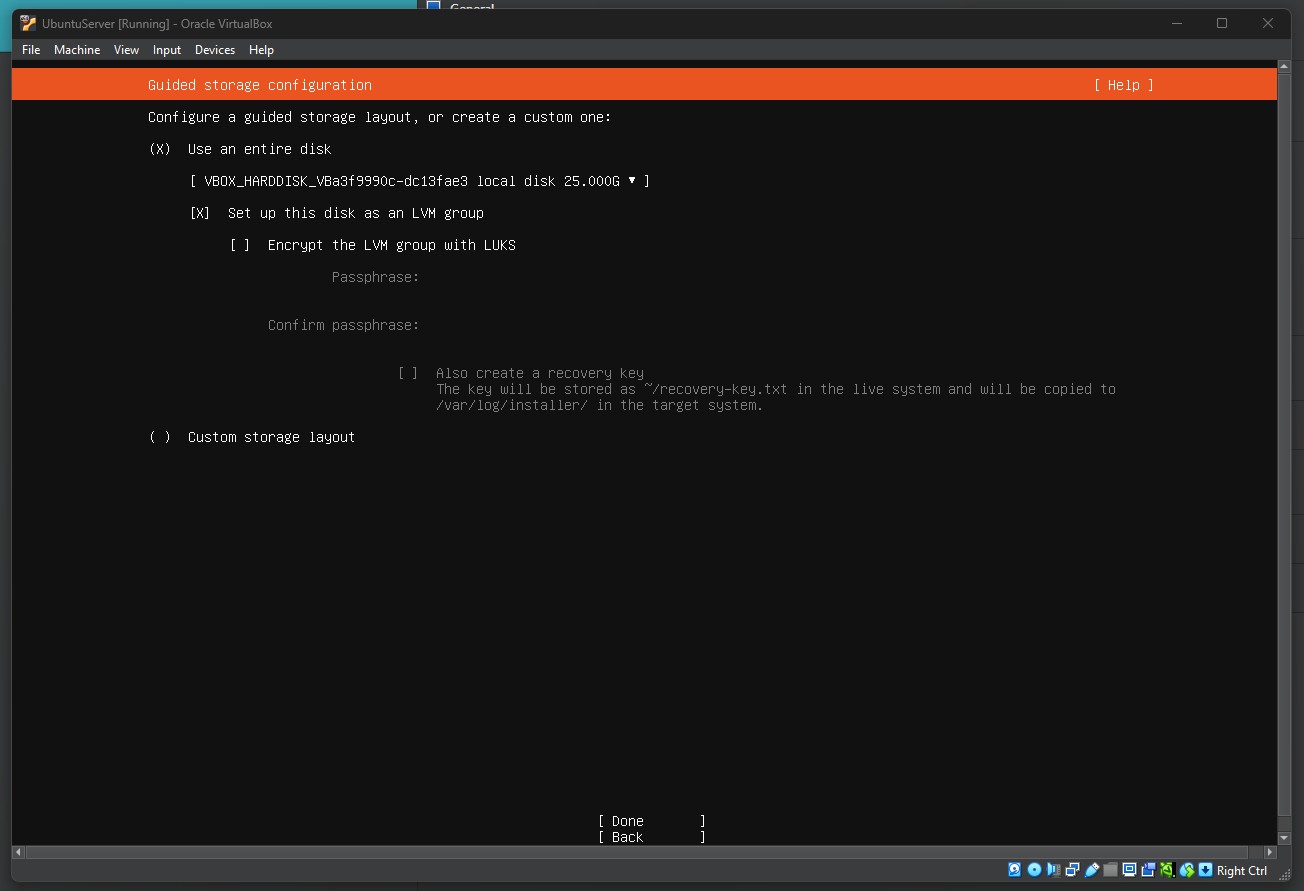
Guided Storage Configuration
The storage selection has defaulted to the 25GB hard drive size that was defined when setting up the new virtual machine. For this tutorial, we will accept the default selection of “Use an entire hard disk,” configured for 25 GB.
Use the down arrow to navigate to the Done option and press the Enter key to continue.
The next screen is Storage Configuration.
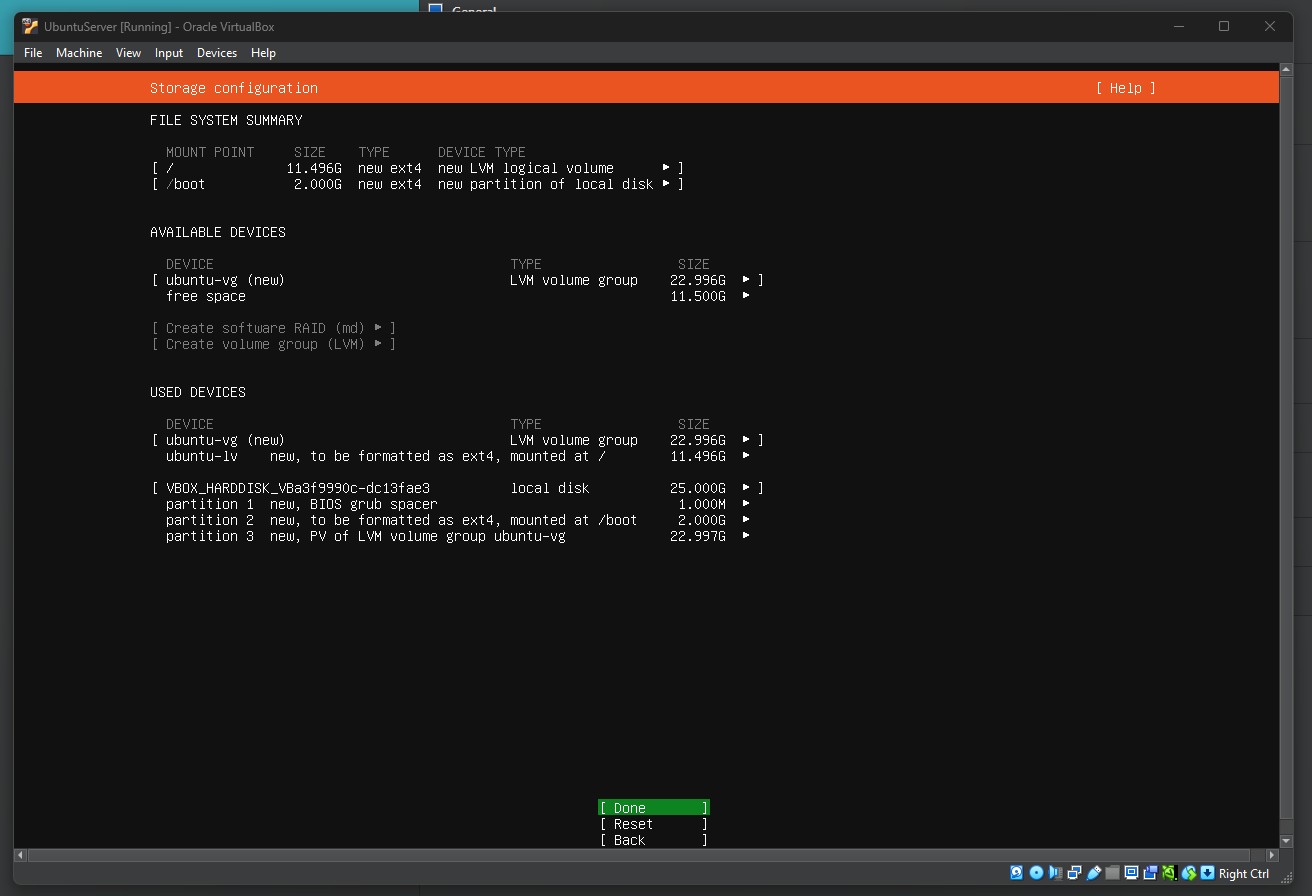
Storage Configuration
We can accept the defaults here. Select the Done option and press Enter to continue.
The installation process requests confirmation of the destructive action.
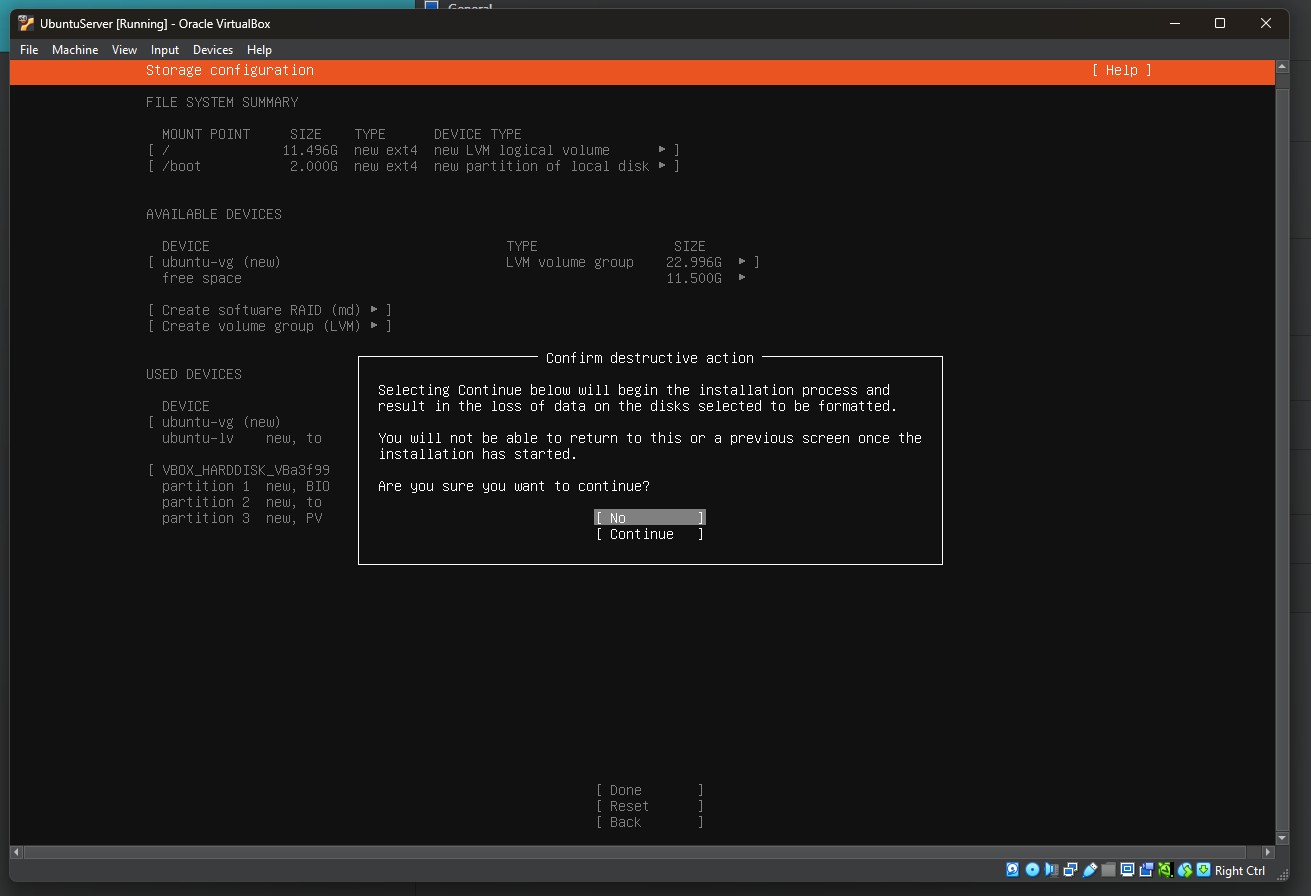
Confirm Destructive Action
This warning indicates that the installation is going to format the disk it is about to create. If we were using an existing disk or an existing VDI file, this would overwrite the data on that file. For this tutorial, we can select Continue and press the Enter key to continue the installation.
The installation process will prompt you to complete the server’s profile configuration.
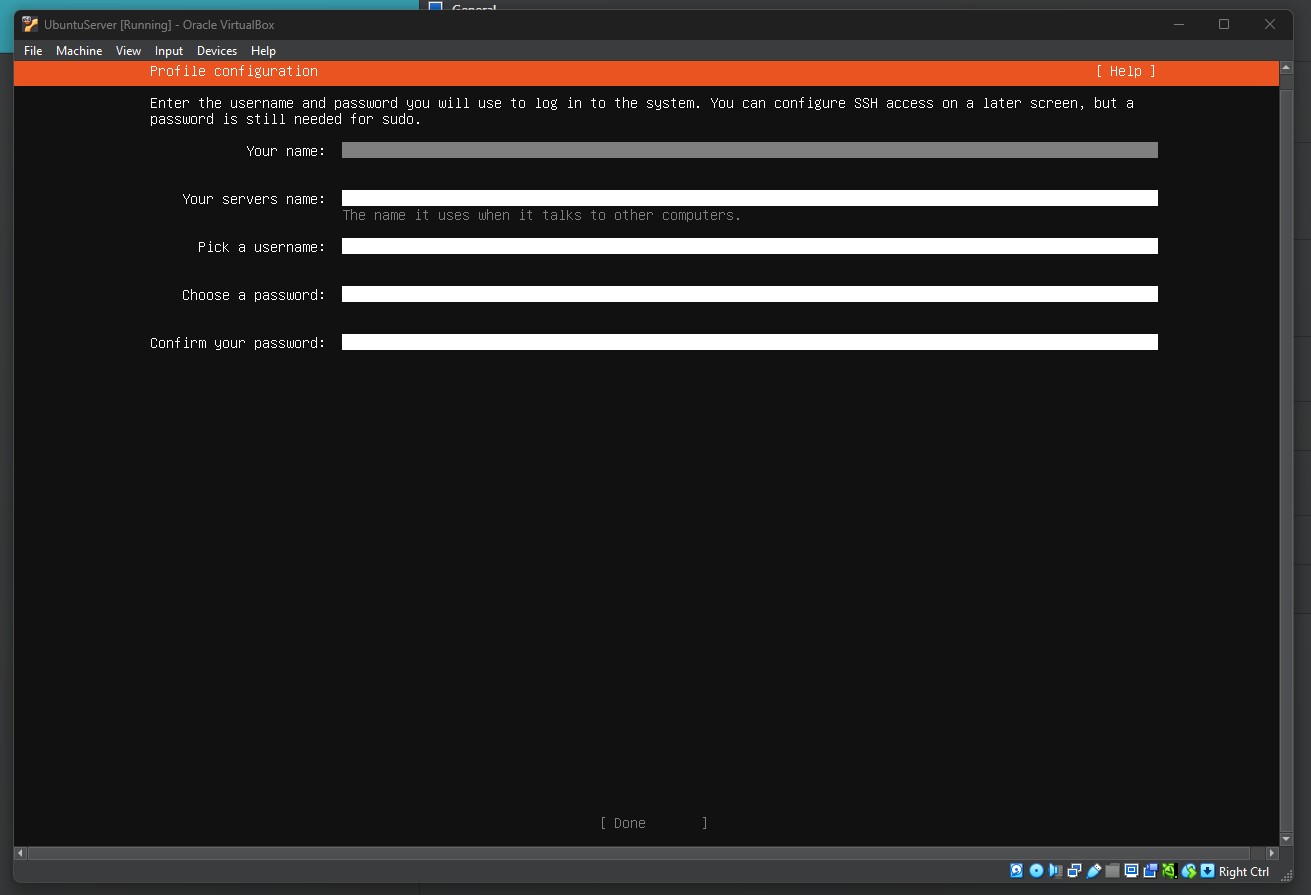
Profile Configuration
Enter the information into the fields. An example is shown below. Choose options appropriate for your needs.
Make sure you note the password and keep it in a safe location so you can remember it later.
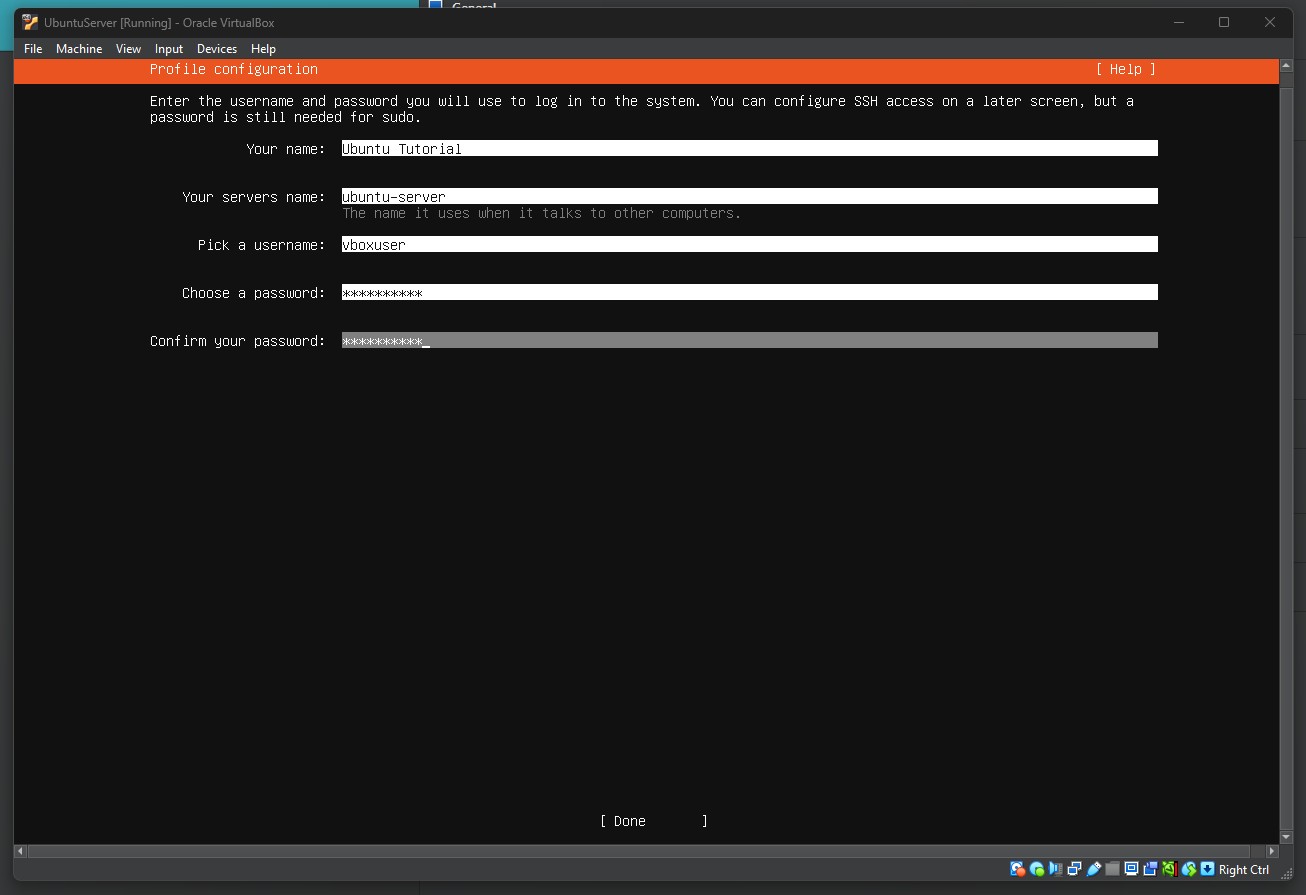
Profile Configuration Completed
Select the Done option and press Enter to continue.
You will be prompted to upgrade to Ubuntu Pro. This isn’t needed for a test virtual machine that will only be used for educational purposes.
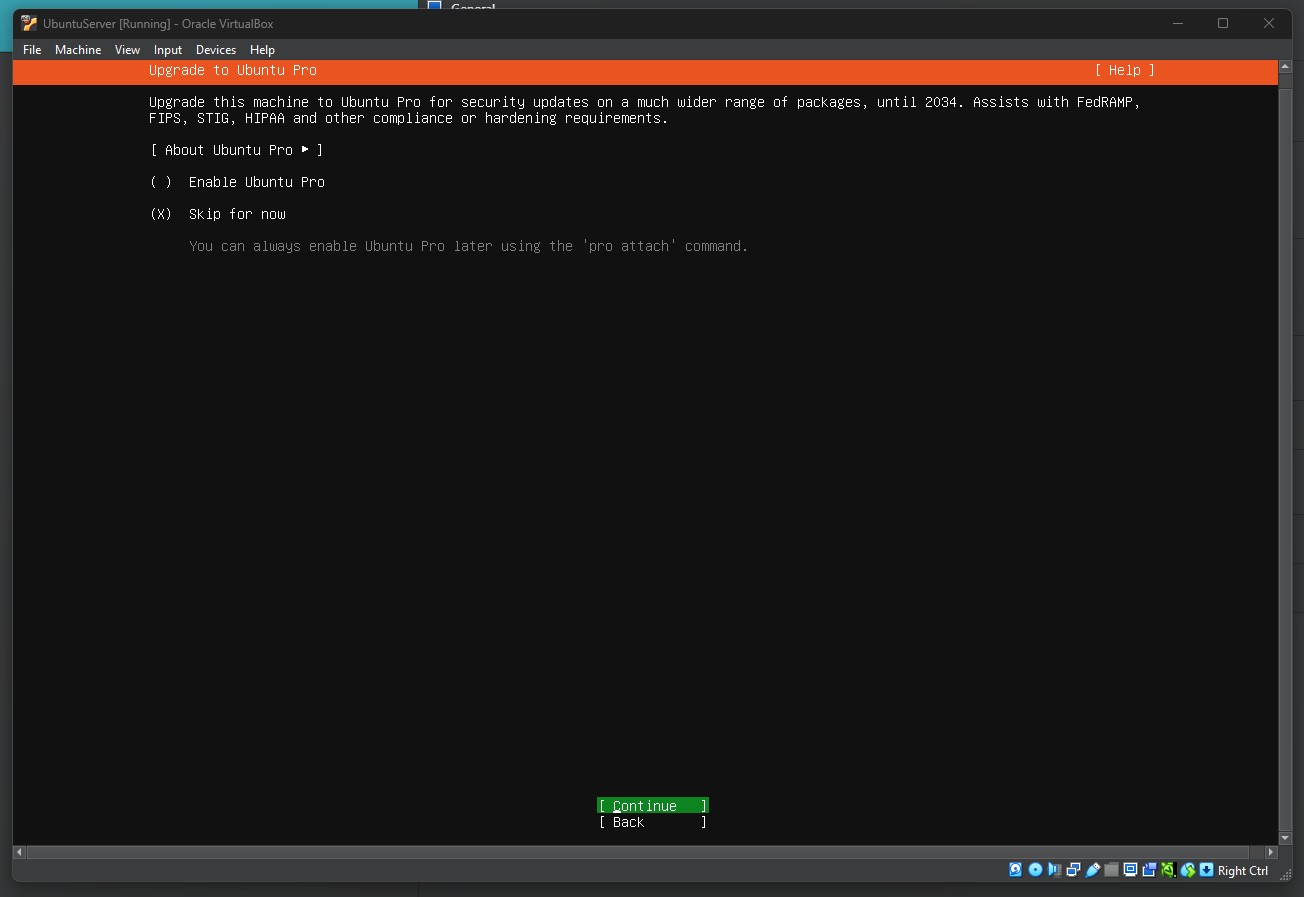
Ubuntu Pro Upgrade Prompt
Leave the default as “Skip for now.” Select Continue and press Enter.
The SSH Configuration screen will display.
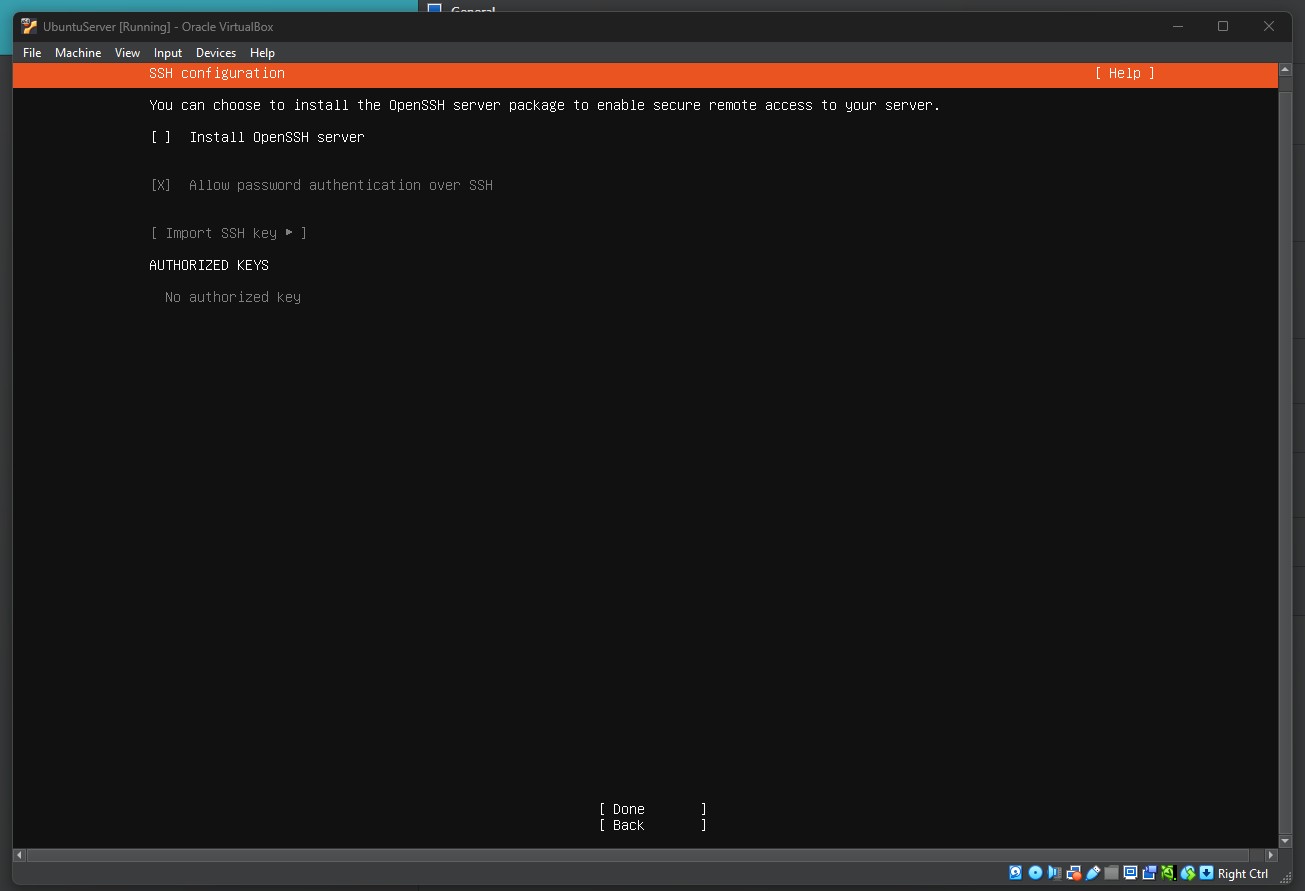
SSH Configuration
For this tutorial, we will skip installing OpenSSH server. Installing OpenSSH during setup is convenient if you plan to use remote terminal access right away. That’s outside the scope of this tutorial. We can always install this later, if needed. Use the down arrow key to navigate to the Done option and press Enter to continue.
The installation will prompt for the selection of featured server snaps to install.
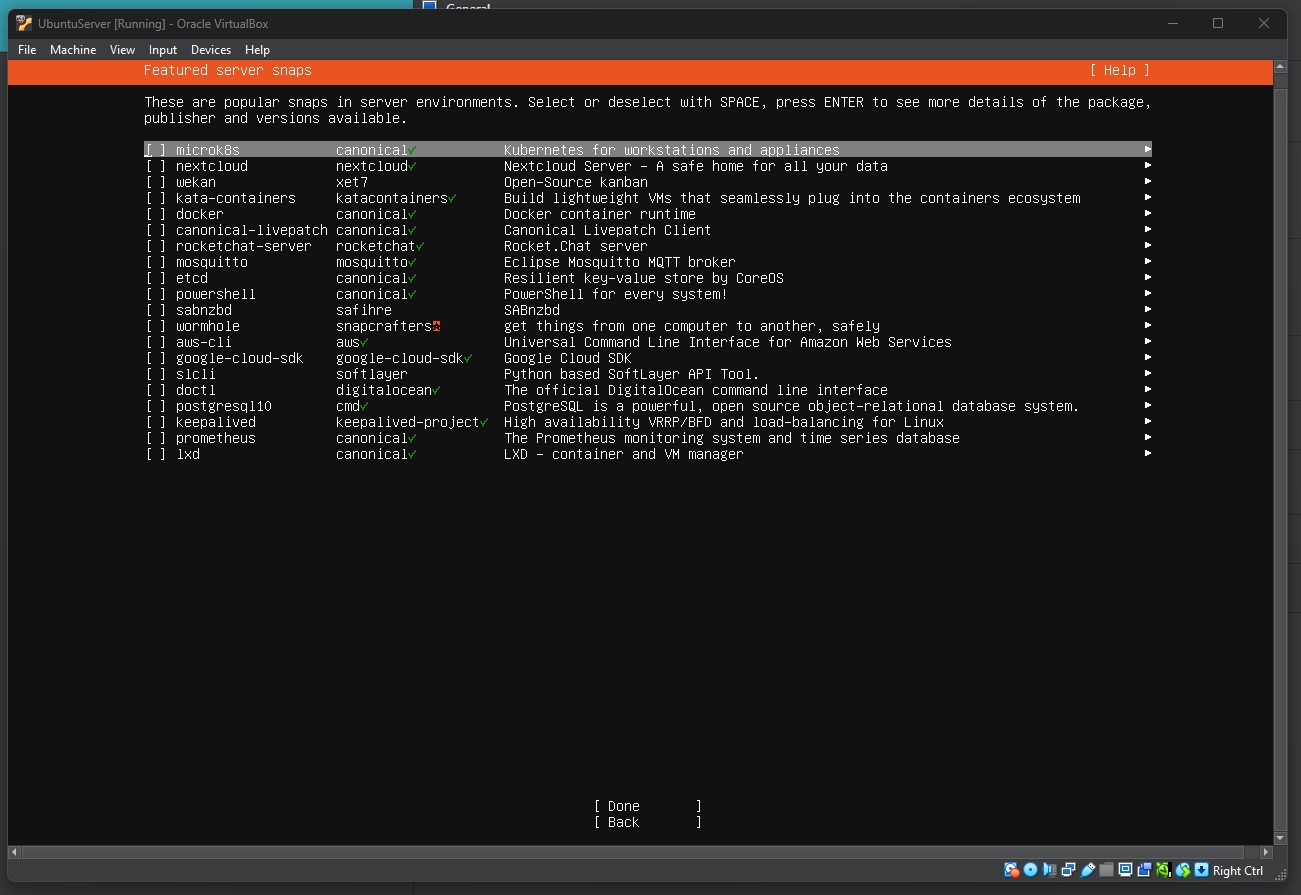
Featured Server Snaps
We won’t need any of these for this tutorial. Select the Done option and press Enter to continue.
We’ve now completed all of the configuration. The installation process will proceed to the Updating System screen.
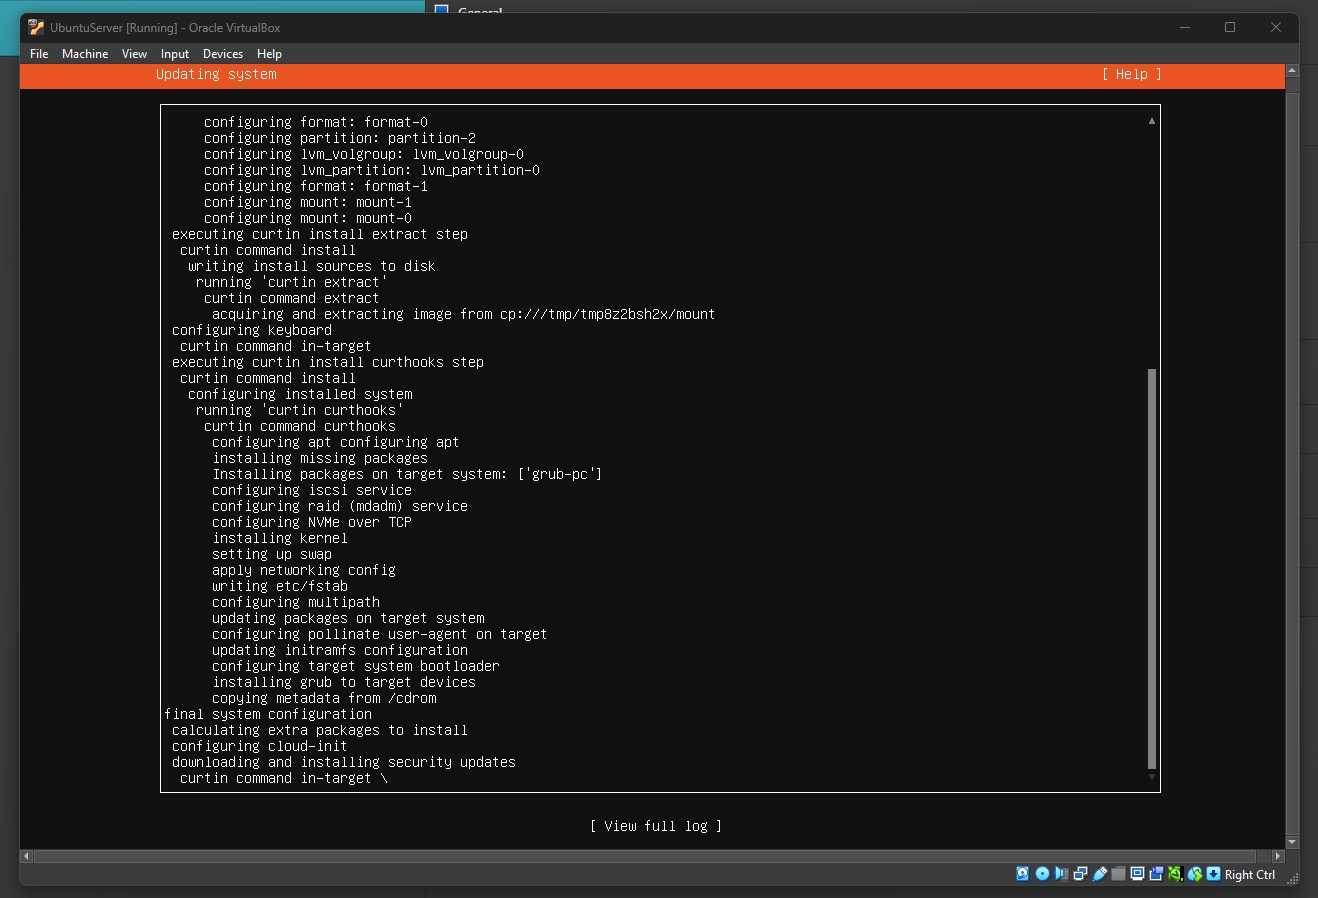
Updating System
This process will take several minutes to complete. There may be times where it looks like the installation process isn’t doing anything or is stuck. You can watch the icons in the lower right corner of the virtual machine menu to confirm network and disk activity:
VirtualBox Icons to Monitor
Once completed, the text at the top of the screen will change to “Installation complete!” and “View full log” and “Reboot Now” options will display at the bottom of the screen.
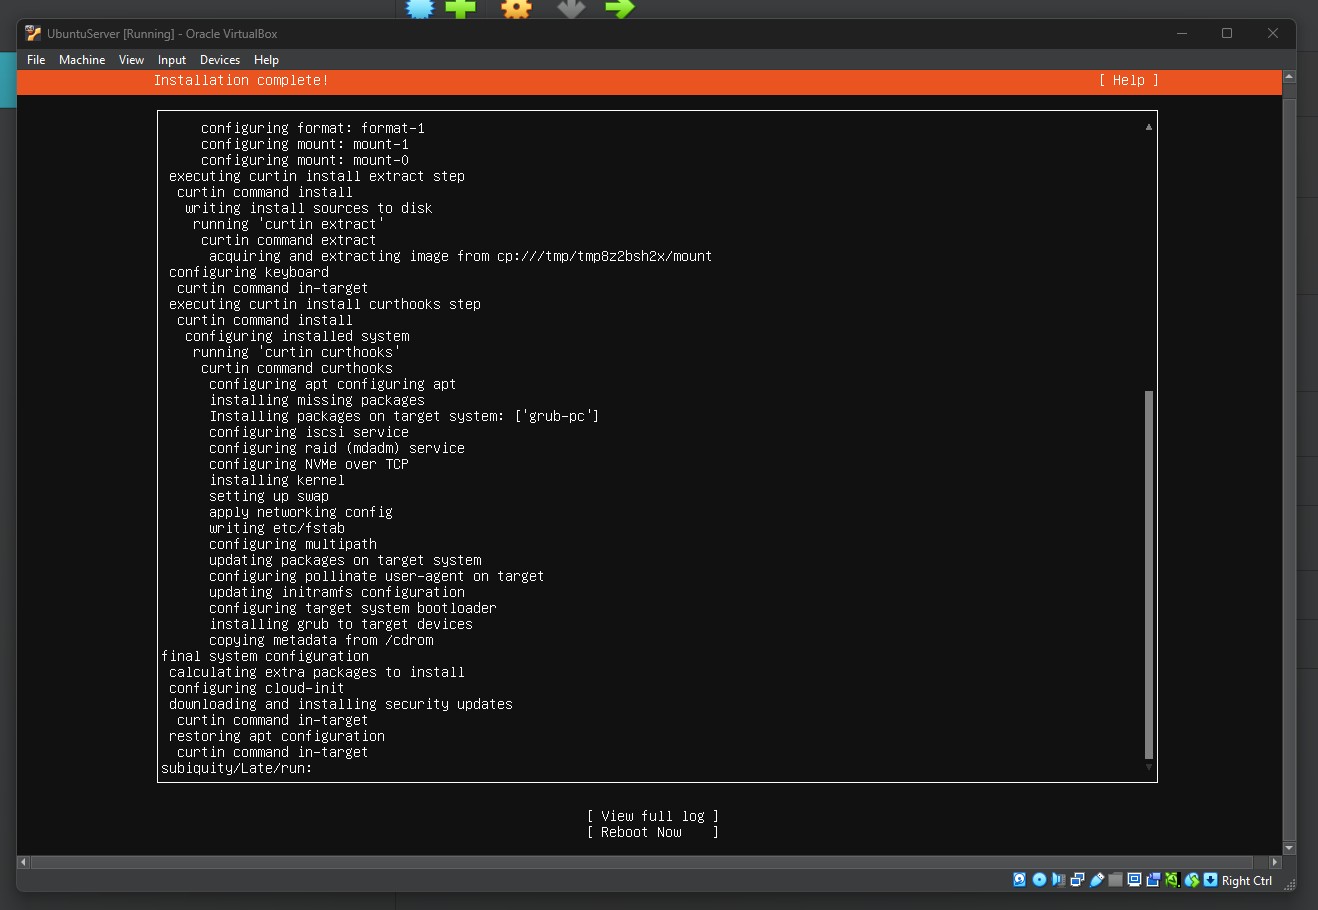
Installation complete
Select the Reboot Now option and press Enter to reboot the virtual machine.
You will likely see an error with the text “Please remove the installation medium, then press ENTER.”
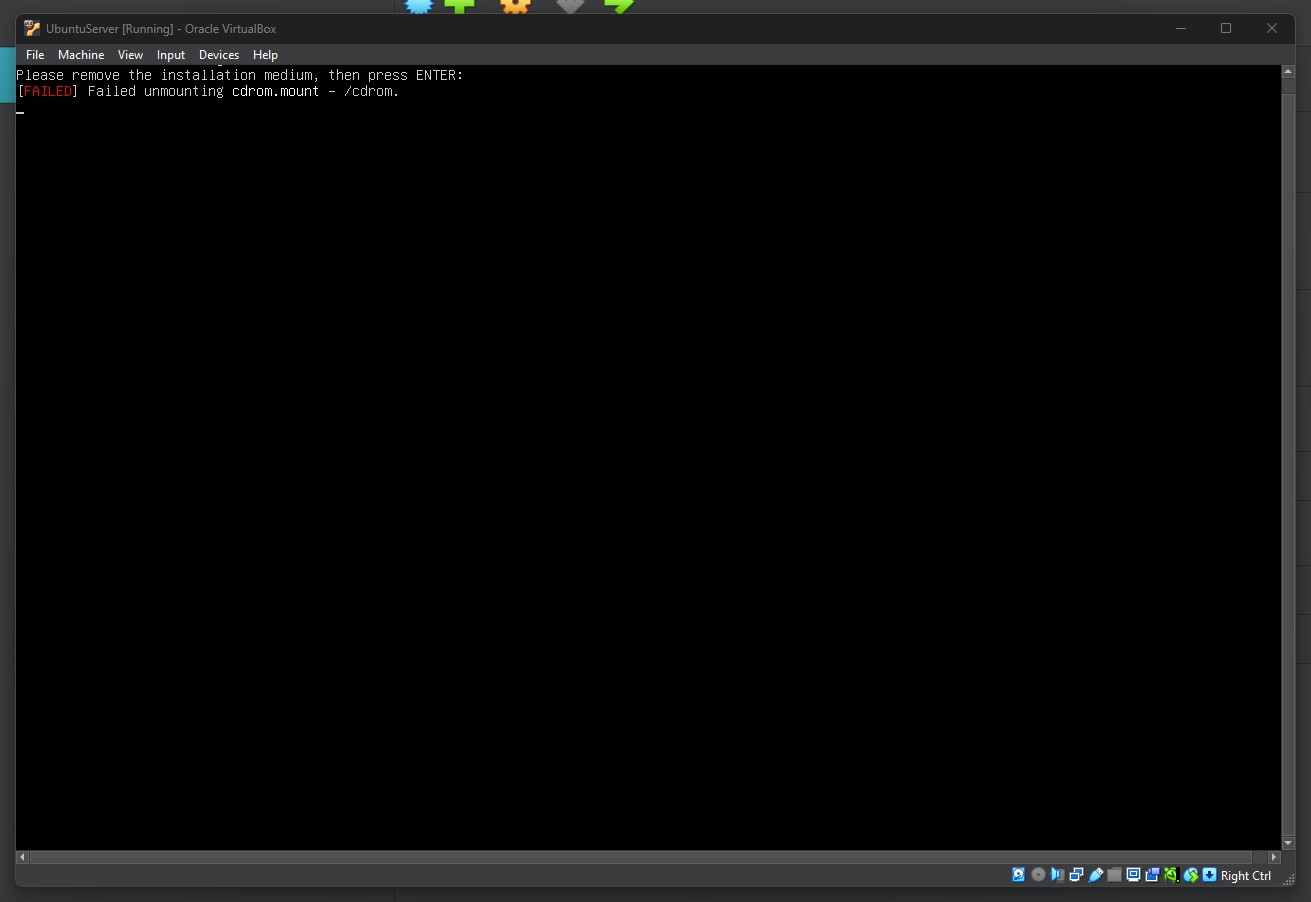
Installation medium error
This occurred both times I installed Ubuntu Server for this tutorial. You can simply press the Enter key to continue. The server will finish rebooting.
After the reboot, the screen may get stuck. Click anywhere in the virtual machine and press the Enter key. The login prompt should display:

Login Prompt
Enter the username created earlier in the Profile Configuration section and press Enter. You will be prompted for the password.
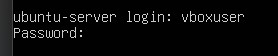
Password Prompt
Enter the password created earlier and press Enter. If the password is accepted, you will see a screen like the following and will be at the shell command prompt:
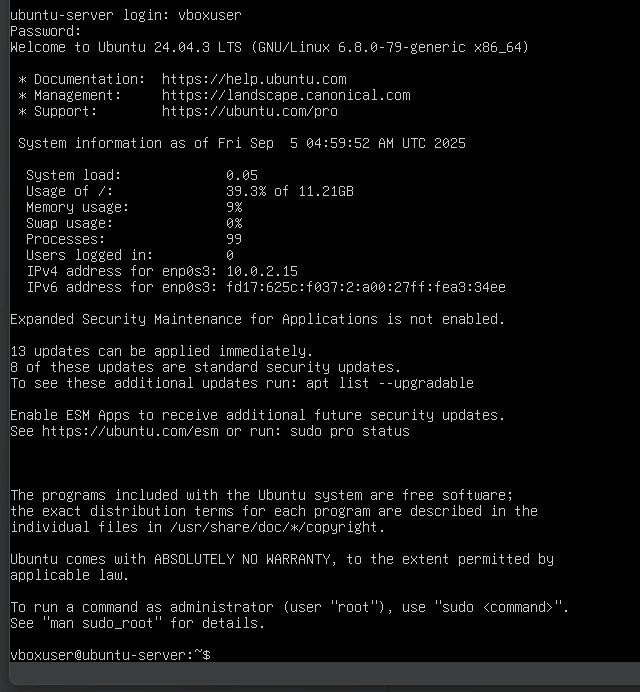
Shell Command Prompt
I’ll enter the clear command and press Enter to clear the screen. Then enter the date command to print today’s date.
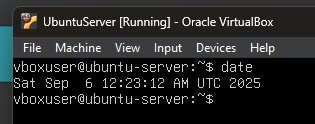
Date Command Output
After completing the installation, some commonly done tasks are:
Update the system:
Run
sudo apt update && sudo apt upgradeto refresh package lists and apply available upgrades.Enable remote access:
Install OpenSSH or create a shared folder if remote access is needed for data transfer between the host and the virtual machine.
Shutting down the virtual machine
To shut down the virtual machine, run
sudo powerofffrom the command line.Rebooting the virtual machine
To reboot the virtual machine, run
sudo rebootfrom the command line
This completes the instructions for installing an Ubuntu Server VM on a Windows 11 host using Oracle VirtualBox. Future posts on this blog that use Ubuntu or other Debian-based Server VMs for the examples provided will reference these instructions.