
Options to Transfer Files Between the Host Machine and a VirtualBox VM
After creating a VM with Oracle VirtualBox, one of the first things that may be required is to copy files from the host machine to the VM. Fortunately, there are several options, ranging from very easy and built into VirtualBox to more difficult, but closer to real-world server setups.
For these examples, I’ll be using the virtual machines that I created for my Ubuntu Desktop and Ubuntu Server VirtualBox tutorials. I have also updated VirtualBox to the latest version.
Tested with: VirtualBox 7.2.6, Windows 11 (24H2 at time of writing), and Ubuntu Desktop 24.04.3 LTS and Ubuntu Server 24.04.3 LTS.
This post will grow over time as I am able to add documentation for new options. Currently, Drag and Drop, File Manager, and Shared Folders are documented in this post.
Some options require Guest Additions. Instructions for installing Guest Additions can be found at the beginning of my post on how to fix drag and drop issues between host and guest .
Common options for transferring files between host and guest:
| Method | Desktop Required | Works on Server | |
|---|---|---|---|
| Drag and Drop | Yes | No | |
| VirtualBox File Manager | No | Yes | |
| Shared Folders | No | Yes | |
| SSH/SCP/SFTP | No | Yes |
Dragging and dropping a file is one of the simplest ways to copy a file from the host to the guest. Simply open a file manager window on the guest desktop and then drag the file from the host system to the target location on the guest system.
This option only works if the guest operating system has a graphical desktop environment installed.
Since it’s a common issue, if you try to use Drag and Drop and you get an error similar to:
“DnD: Error: Drag and drop to guest not possible – either the guest OS does not support this, or the Guest Additions are not installed”
Oracle VirtualBox: Fix the Drag and Drop Operation From Host to Guest Failed error explains how to fix that.
Another very simple way to transfer files between the host and the VM is to use the VirtualBox File Manager. The steps are basically the same between Ubuntu Desktop and Ubuntu Server, but I’m going to show examples using both.
I’ve started the Ubuntu Desktop VM and have it open on my host machine.
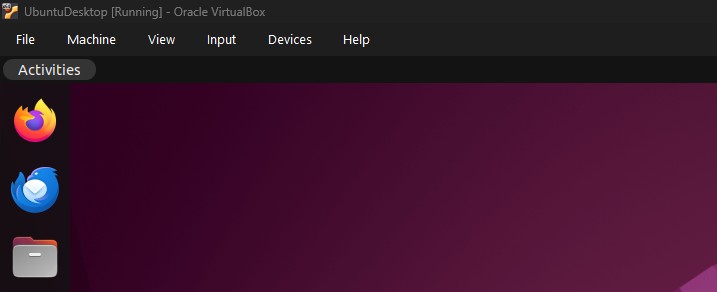
Ubuntu Desktop VM Running
The following steps can be executed to transfer files between the VM and the host using the VirtualBox File Manager.
- Click Machine > File Manager…
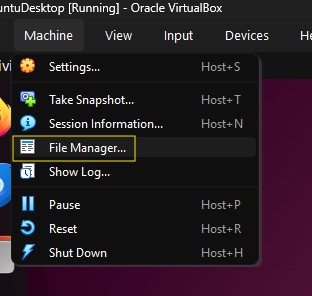
File Manager Option
After clicking on File Manager…, the File Manager dialog will open.
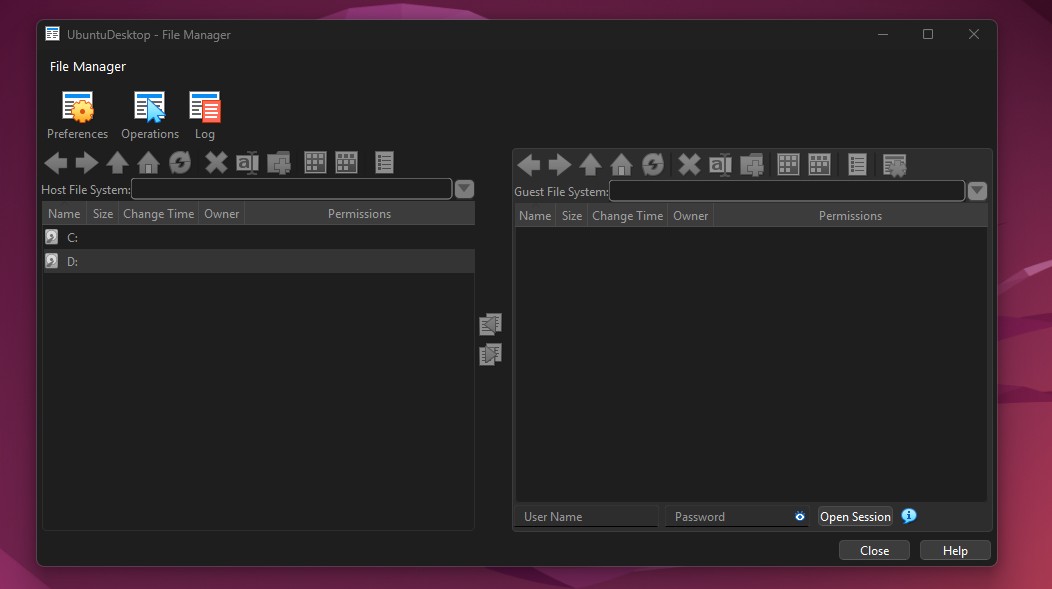
File Manager Dialog
- Start a Session
This part of the process is not very intuitive. In order to transfer files, we need to start a session in File Manager.
To start a session, enter the guest VM’s user credentials in the User Name and Password fields and click Open Session.
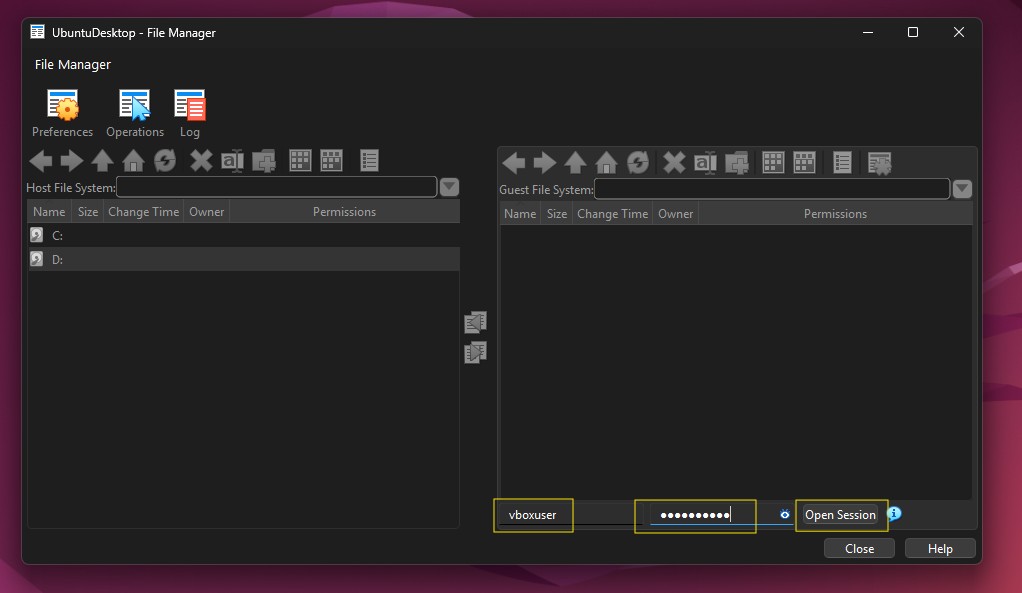
File Manager Open Session
After clicking on Open Session, the Guest File System contents will be visible in the File Manager window and both the Host File System and Guest File System panels will be accessible.
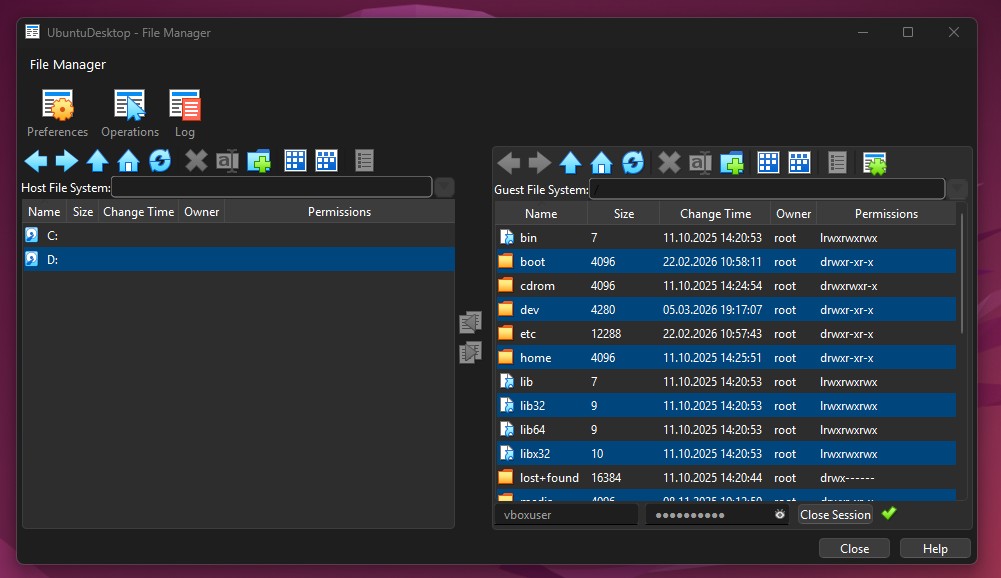
File Manager Session Opened
- Transfer files between systems.
From here, VirtualBox is ready to transfer files. A good/safe place to start is the user’s home directory on the VM. I can navigate to the home directory by double-clicking on the home directory and then on the vboxuser directory.
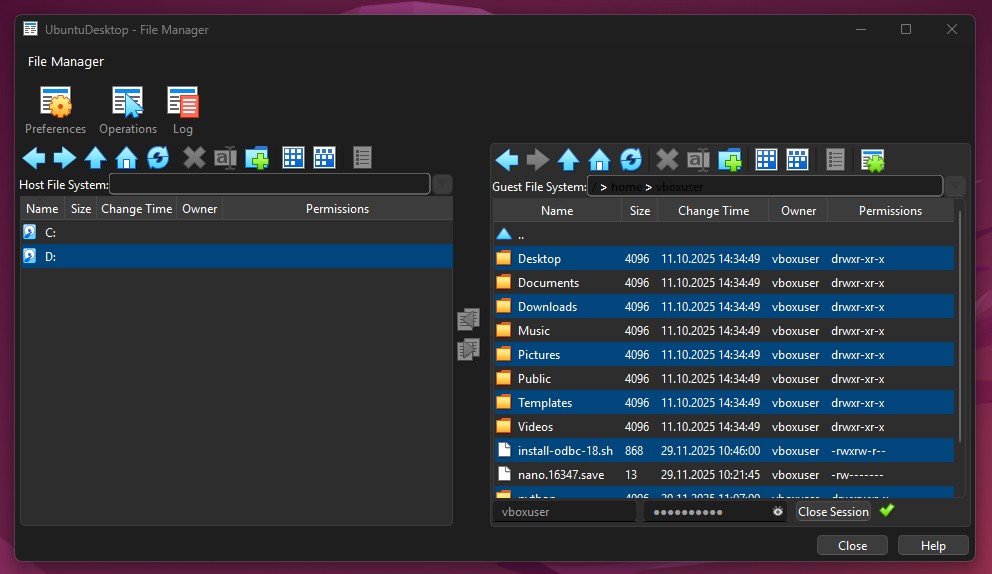
Contents of User Home Directory
I created a directory on my host machine under D:\VM File Transfer. I can click in the Host File System panel to navigate to that path.
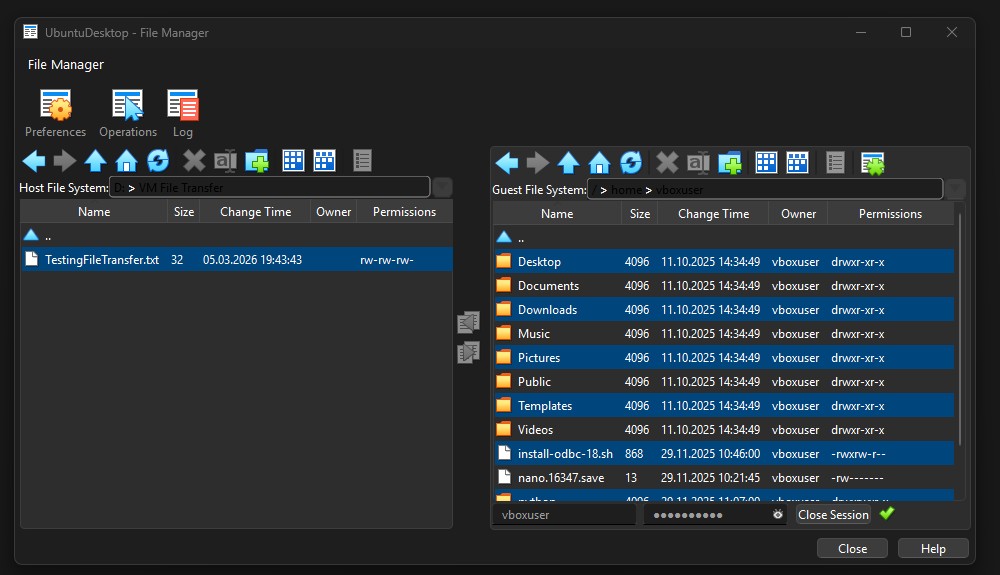
Contents of Host File System Test Directory
From here, I can simply click the arrow button to copy the files from the Host File System to the Guest File System.
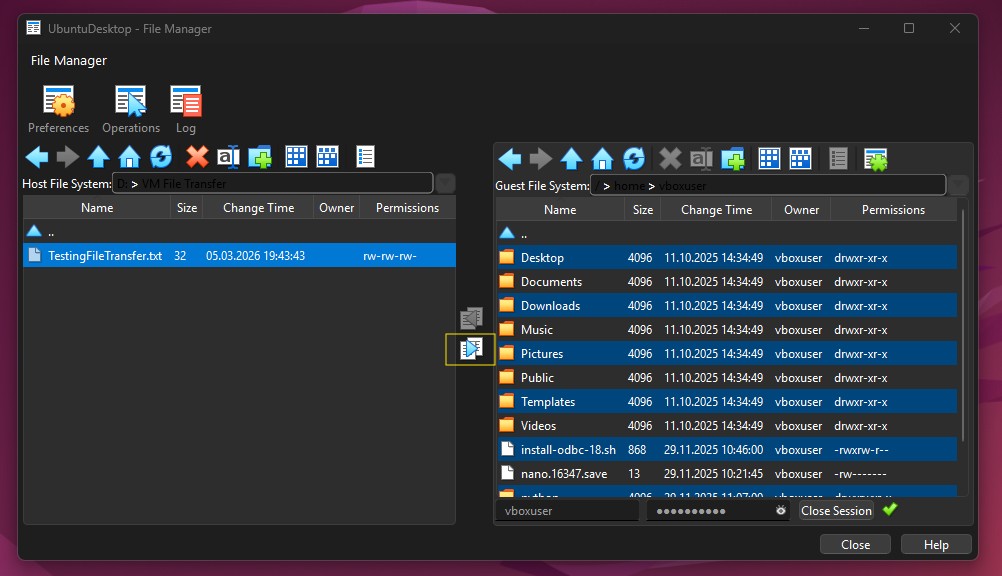
Button to Transfer Files from Host to Guest
The file is transferred.
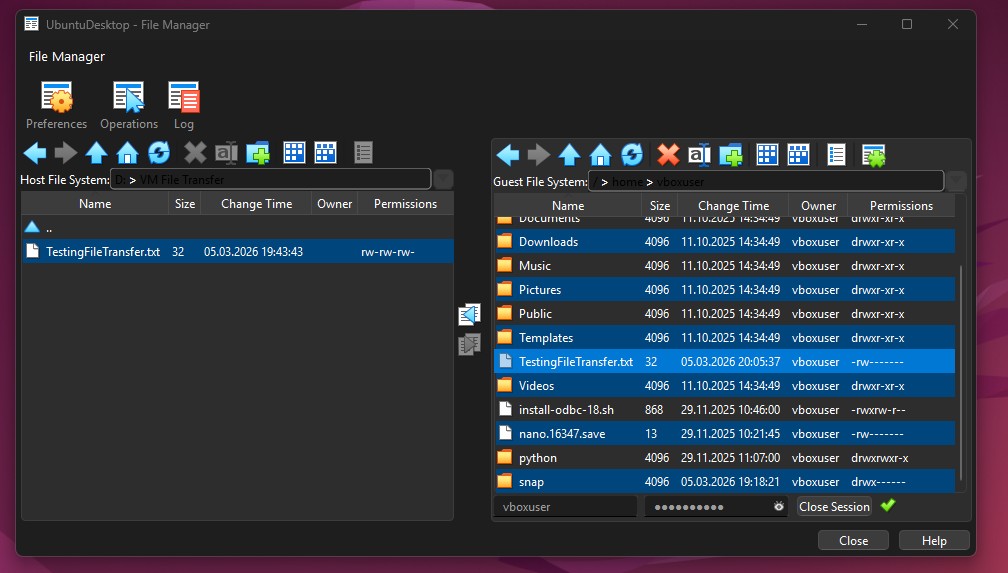
Transferred File Shown in Guest File System Panel
Multiple files or directories can also be selected in both the Host File System and Guest File System windows.
If I open the Files window on the Ubuntu Desktop VM, I can see the new file is now available on the VM.
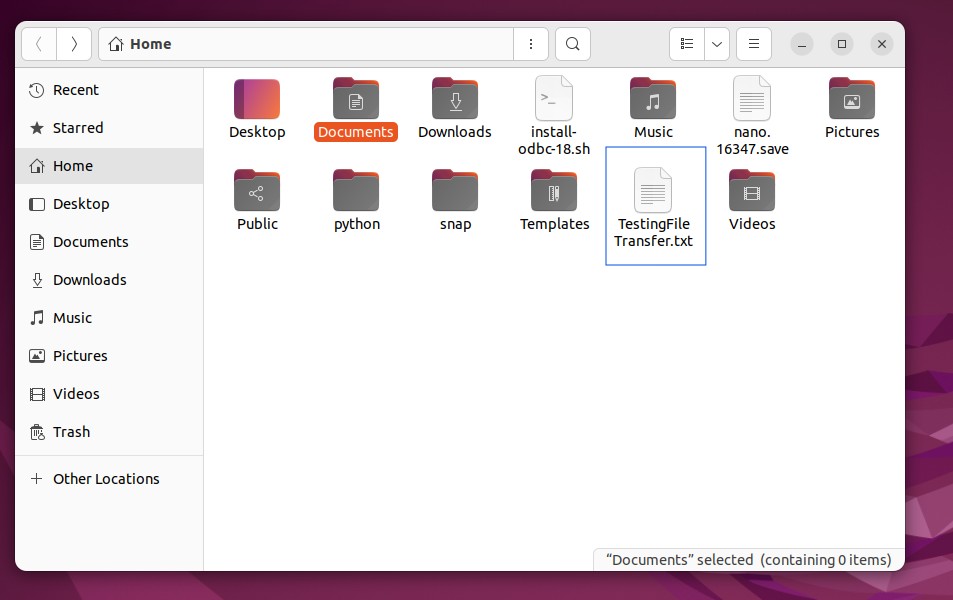
File Showing in VM Files Window
Now that I’m done transferring the files, I can click the Close button to close the File Manager session.
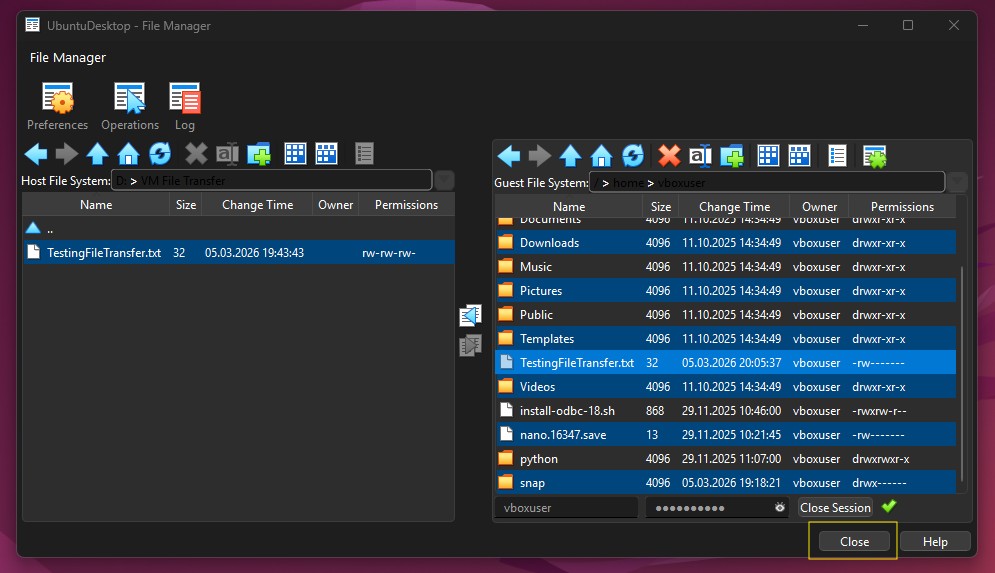
Click the Close Button to Close the Session
I plan on adding step-by-step instructions for how to do this on a server, but for now, it’s enough to state that the steps are exactly the same for transferring files.
- Start the Server VM.
- Open the File Manager.
- Start a File Manager session using the VM credentials.
- Use the Host File System and Guest File System panels to transfer files.
- Close the session when complete.
Open the Shared Folders settings from Machine -> Settings… -> Shared Folders or Devices -> Shared Folders -> Shared Folders Settings…
Click “Add new shared folder” icon to create the shared folder.
Enter the folder path on the host machine. I used D:\VBoxShared in my example, as my host OS is Windows 11.
Optionally enter the mount path on the guest machine. If you don’t define a path, VirtualBox will typically pick /media/sf_[hostfoldername], where [hostfoldername] is the name of the folder on the host machine. So, if I don’t pick a mount point for my example from step 3, then the shared folder location and name will be /media/sf_VBoxShared.
Choose your shared folder options.
Read-Only - Makes the shared folder read-only for the guest OS. Choose this option if you do not want the guest OS to be able to delete files from the shared folder.
Auto-Mount - When this box is checked, the guest OS will try to automatically mount the shared folder on startup. I recommend checking this box if you are unfamiliar with mounting drives.
Make Machine-permanent - Makes the shared folder permanent to the selected virtual machine.
Make Global - Makes the shared folder available to all virtual machines. A shared folder cannot be both Machine-permanent and Global.
If neither Make Machine-permanent or Make Global is selected, then the shared folder is created as a Transient folder. Transient folders will only persist for the current session. If the machine is powered down, then the shared folder will no longer exist the next time the machine is powered on.
Click OK to create the shared folder.
Navigate to the shared folder. Open a terminal (if on a desktop Linux VM). Use the command line to navigate to /media. You should see a folder named sf_[hostfoldername]. Again, where [hostfoldername] is the name of the folder on the host machine.
From here, you can try to access the folder. If you get a permission denied error, then you might need to add the user to the
vboxsfsecurity group. If you are using a Debian distro, like Ubuntu in my examples, you can runsudo adduser [username] vboxsfto add the user to the vboxsf group.
There are several options for transferring files between the Host machine and a VirtualBox Guest VM, ranging in difficulty from relatively easy to relatively hard, depending on experience. Drag and Drop, VirtualBox File Manager, Shared Folders, and SSH/SCP/SFTP are common options. Drag and Drop require VirtualBox Guest Additions. Shared Folders require either VirtualBox Guest Additions or the VirtualBox Guest Utilities package appropriate for the guest OS. VirtualBox File Manager can work without Guest Additions, but Guest Additions improves compatibility. SSH/SCP/SFTP use network protocols and require network connectivity (Bridged or NAT with port forwarding) and an SSH server be installed and configured correctly on the guest VM.
Next steps for working with your VM:
Fix Drag and Drop issues:
Oracle VirtualBox: Fix the Drag and Drop Operation From Host to Guest Failed errorLearn how to install Ubuntu VMs:
Ubuntu Desktop VM Tutorial
Ubuntu Server VM Tutorial